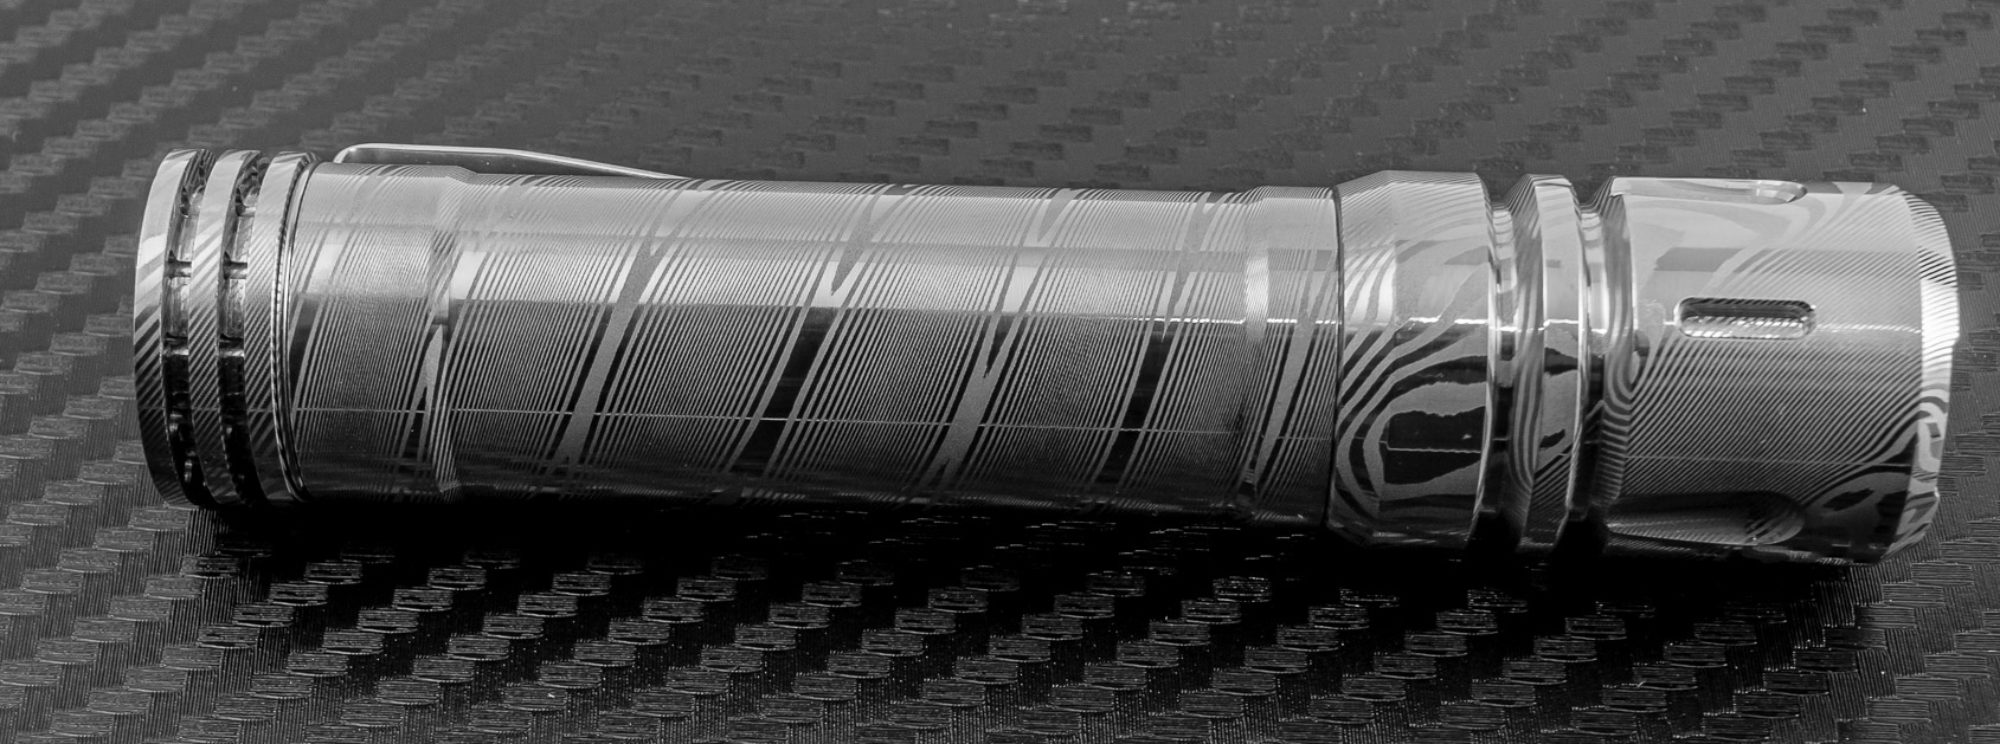
Sofirn SP36 (6000 Lumens, USB-C Charging)

Sofirn has a new light on the market called the SP36. It’s basically a smaller, lighter version of the BLF/Sofrin Q8 that has charging over USB-C. Instead of 4 18650 batteries, it’s using 3, but retains 4 LED’s. Thanks to Sofrin for sending this to me to take a look at. Remember to checkout the coupons at the end of this post if you are interested in this light.

Full Image Gallery: https://imgur.com/a/Tfteaor
YouTube Version of this Review:

Packaging
Packaging is pretty minimalistic. The light arrived in an unlabeled brown cardboard box with a bit of foam in the bottom. The light was in a thin sheet of bubble wrap. It arrived with a Happy/Not Happy card, a manual that while small print does a solid job of explaining things and does warn about using button top protected cells. It also includes a USB-A to USB-C cable which is nice given how USB-C is still an up and coming spec.

Construction
Construction of the SP36 is comparable to other Sofirn lights, and is good for the price range. The light is made from aluminum and anodized a semi gloss black. All edges are nicely machined. Threads are square cut but mostly dry. The tail cap is removable, and flat, it tailstands very well. Inside you can see 3 phillips screw holding the rear circuit board in place, these were very tight, but removable with the right driver and pressure. The board itself has 3 fairly heavy duty dual springs inside. The body tube has 3 bands of continuous heavy knurling on the outside, it’s a basic design but it’s effective. The inside has a seperator for the 3 batteries and when everything is screwed in I didn’t get any rattle.


The head is very reminiscent of the Q8, which this light is roughly based off of. Unfortunately the circuit board is glued in place, I tried removing it with a pair of snap ring pliers and ended up damaging the circuit board slightly. Reading on BLF the board is removable but it takes heat and a lot of work. The exterior of the head features milling on the sides for heat dissipation. On the front you have the only label on the light, it’s name. Below that is the button. It’s recessed into a milled area. Under the electronic button you have 2 green LED’s. Opposite the button on the other side of the light you have the USB-C charging port. It’s at normal depth and I didn’t have trouble with different cables I tried. The cover is tight fitting and stands proud a little bit. It’s rounded and comfortable in the hand. The bezel is smooth and flat, it’s all one piece so it’s not removable. The lens is glass and has some anti reflective coating. The optic is a deep quad with thin walls.


Unfortunately the head lacks a threaded insert for connecting the light to a tripod or for a solid attachment point for a lanyard. This is disappointing to me as I really like that on these larger lights, I think it helps for use with area lighting and lanyard attachment. I will have to look up some paracord work to use an attachment instead.

Size
The SP36 feels good in my hand. If the Q8 is just a little too fat, the SP36 should be about right. I measured total length at 125.25mm, maximum diameter at 49mm, minimum diameter at 45mm and weight with 3x Samsung 30Q at 436g.

Compared to the Q8 you really notice the difference in diameter in the head. There is a difference in size in the body tubes but it’s less than you would think. Only about 5mm of difference in diameter. The difference in weight with 30Q’s is 157g. While that’s significant both lights are heavy enough it’s hard to tell much of a difference when in use.


LED/Runtime/Heat
This light uses the Cree XP-L2 LED’s in the 5300-5700k range. Mine seems to be on the cooler side of this, I guess I will call it neutral white, better than cool white. Beamshot is more of a flood then the Q8, but with the 6000 lumens its enough power to throw ok too. Good general purpose beam. There are not any real artifacts i notice at 10+ feet. At shorter distance there are definitely petals in the beam due to the deeper quad reflectors.The head can be powered directly off USB-C but it won’t get anywhere near full brightness.

The light does have LVP (Kicks in at 2.8V) but Sofrin recommends using button top protected batteries. I didn’t have any of those I wanted to use with this light so I used button top Samsung 30Q’s for my runtime tests which worked well. Turbo (6000 lumens) ran on this light for 2 minutes before stepping down to a relative output putting it around 1200 lumens where the light ran and declined out to the 145 minute mark where it stepped down significantly over several steps over the next 30 minutes. At about 180 minutes the light effectively was at 0% relative output but still powered on out to 400 minutes.

The SP36 6000 lumens and smaller diameter means it gets warm, pretty quickly. At the brightest I measured the light at 1 minute at 104F, at 5 minutes at 107F, and at 10 minutes at 116F. This is quite warm, and the light gets even warmer, after about 20-25 minutes (I did a brief turn off, then turn on and run again) it was at 139F which is too hot to hold and is in burn you territory.

UI
NarsilM 1.2 Firmware with good ramping support. It has lots of options but it’s also easy to use. I love the ramping, it’s easy and intuitive and you can pick the exact amount of output you want. On this light there is no complaining when it comes to mode spacing. I plan on leaving my light at the default settings but if you do want to change things please consult the UI section of the manual. You need to read it more than once before attempting to make any setting changes. Things that are configurable are vast. You can disable ramping and go with 12 different mode spacing options, you can configure moonlight levels, thermal controls (Several), blink modes, mode ordering, LED locator feature, battery level indicators etc.

In stock mode the light also has memory mode, direct access to turbo with a double click. Triple click shows the battery level. 4 clicks to lock or unlock. When in max output mode double click to get to the different strobe modes.

Recharging
The SP36 features USB-C for recharging which is great. Unfortunately it only accepted a charge while using a USB-A to USB-C cable, not a C-C cable. It doesn’t support USB-C PD for faster charging meaning it took me 4 hours and 25 minutes to charge 3x Samsung 30Q batteries that were depleted. The peak charge rate I saw was 1.86A. With the ability for USB-C to draw more wattage from a compatible charger, and that this light has 3x batteries it would be nice to see this utilized but for the price here, I am just happy it has USB-C.

Pro’s

  • Proven Design & well built (Except for the glued in board)
  • USB-C recharging
  • Good NarsilM 1.2 firmware
  • Good pretty comprehensive manual, with some funny translation easter eggs. Very small print though.

Con’s

  • No Tripod mounting hold or place for a Lanyard. Kind of disappointing as this is a larger heavier light and I tend to use a lanyard with them.
  • XP-L2 LED’s in a cooler neutral white.I would love to see some different LED’s (warmer, High CRI, etc). offered here as would many on BLF. I would love to see something like a LH351D used on this light.
  • Heat – It gets really hot, fairly quickly and can get dangerously hot.

Conclusion
The Sofirn SP36 what you get when you take a BLF Q8 and reduce it by ¼ in most ways. It has one less battery, the body is narrower, and it’s lighter, but the spirit of the Q8 and SP36 are same. It gains USB-C charging which is great to see over MicroUSB, but it’s not gaining a big speed increase USB-C is capable of, so with 3 18650 batteries it still takes a while to charge. The built in charger does seem to add some cost over a Q8 which is to be expected. The SP36 is a good light, I think the decision between it and a Q8 variant comes down to how much you want built in USB-C charging and how much of a tint/LED snob you are. Both are great lights and I don’t see getting rid of either anytime soon.


Deals

Sofirn SP36 Light Only https://amzn.to/2WpSIrA
Sofirn SP36 Kit Version https://amzn.to/2WmgaGl

Save 20% on either light with the coupon code “B5LGDT2Y”


Astrolux S43 (Quad Nichia LED, 18650/18350, USB Recharging, Hand Warmer Feature)

Astrolux has a small quad LED light, the S43. This builds on the the similar S41 and S42 line of lights. The S43 is a revised design, let’s see what’s good and bad about it. Thanks to Banggood for sending this to me to take a look at today.

Full Image Gallery: https://imgur.com/a/7w2r7Ym

YouTube Version of this Review: https://youtu.be/dq8lWspqUSY

Packaging

Packaging is pretty similar to other Astrolux lights of this size. It’s a brown paper box, with a bowtie cut in the middle almost. On the side is a sticker with the model and LED option on it. Inside the light is protected in foam. The S43 comes with lots of accessories that were once addon items in previous version. It now comes with a deep carry pocket clip, 18350 tube, lanyard, and glass breaker/skull cracker spike. It does come with a manual but it’s not quite accurate, it seems to be largely recycled from the S42.

Construction

The head of the light has a non removable crenelated bezel that’s moderately aggressive. Underneath it has a small quad optic, similar to the S41. Below that the light has it’s button that glows green (Can be configured to turn off), surrounding the button is a copper/bronze colored bezel. The sides of the driver are a larger piece of milled aluminum with small heatsinks on the sides. Opposite the side button is the Micro USB charger port and cover. The port is fairly deeply recessed but I didn’t have a problem accessing it with a standard cable. The charger cover does have a tab that I seem to catch with my finger when the light is in use. It’s more annoying than functionally wrong.

The body tube is fairly smooth with no knurling ot texture for grip which is unfortunate.. There are indents at either side for the clip. The tubes are not reversible. It looks very similar to the battery tube on my Emissar D4. The S43 also comes with a 18350 tube which is nice that it’s not an additional purchase. The shorter tube is the same just shorter. It also has areas for the clip to connect. Threads are acme cut, and there is no spring in the head. This causes a bit of a problem if the light is jolted as it loses connection and doesn’t come back on by default.

Glass Breaker/Skull Cracker Spike. The tailcap of the light has as an optional (included) steel spike that can be screwed onto back of the light. For me this is more of a gimmick than useful. Yes it could be used a a self defense option, or used to break glass but the last thing I want is this spike sticking out of my pocket or poking a hole in my bag. Thankfully it can be removed and the threaded hole could be used to connect to a tripod. Personally I would get more use out of this if it was a magnet instead. The spike screws into a ¼ 20 insert. The insert can be removed and I am guessing it’s roughly a ? screw but I ma not quite sure. With the insert screwed in it doesn’t tail stand very stably.

Other versions of this light are also available. There is a version where the head portion is copper, and a red/green anodized version for the holidays. There isn’t a stainless steel model yet but I wouldn’t be surprised if we see one eventually.

Size/Weight

I measured length at 122mm without the spike or threaded adapter with the 18650 tube. Maximum diameter is 30mm at the head, and minimum diameter is 24mm on the body tube. Weight with battery and clip is 141.5G

LED/Runtime

The light comes with 2 versions, a cool white Cree XP-G3 LED and a Neutral white Nichia 219C at 5000k which is what I have. Tint on mine seems a little warmer than 5000k but I don’t mind. The light is capable 2100 lumens on it’s turbo mode.

Beam shots has a warm hot spot in the center that a gradual fade as you move from the center. For a quad light it’s fairly round. At short distances you notice a few artifacts but these mostly fade away at 4-5 feet.

Output & Runtime

The S43’s runtime and heat output is a little disappointing but roughly what I would expect from a small diameter quad Nichia light. So the light is capable of a maximum of 2100 lumens and has a ramping UI as it’s primary UI. I did my testing with a Sony VTC6. In turbo the light ran for just slightly over 1 minute before starting it’s stepdown. At the 1 minute mark I measured 113F at it’s hottest point. That is pretty warm very quickly. Between 1 and 2 minutes the light stepped down twice to about 10% relative output. This is a very big decrease in output really quickly. At 2.5 minutes the light reaches it’s comfortable longer term output at about 5-8% relative output. After 6 minutes I measured the light was 95F. It held this low output out to 375 minutes where the light stepped down a few more times to run at bear minimums. I stopped my runtime test at a little over 500 minutes. Overall I felt like while this light gets bright it’s almost unusable because of how fast the light steps down and how much it steps down. At least with it’s ramping UI you can adjust the output to exactly where you want it. Performance with a quality 18350 should be similar just with a shorter overall runtime. The light does have Low Voltage Protection which is good since you want to run it with a unprotected cell for the most output.

UI

This light has one single side switch (A change from the S41), and uses NarsilM ramping firmware for it’s UI. By default it comes with the Ramping enabled but there is a stepped mode if you prefer. For my testing I left it in the default ramping UI. Ramping is fast taking just under 2 seconds to go from the lowest to highest mode. It gives a brief flash at the top to let you know your there, and does it at the bottom too, although thats hard to see at such a low output. I will like to the manual in the description so you can look at the other options, it looks a little complicated to adjust but after you have done it a few times it’s not too bad.

Link to Mode 1 Manual

Link to Mode 2 Manual

Recharging

The light does have onboard recharging via MicroUSB. I measured the speed at 0.72A and this resulted in my 3000mAh Sony VTC6 taking 5 hours and 2 minutes to charge to completely full. A little slow for an 18650 but a very safe speed especially if your using it with a 18350.

Pro’s

  • I like that it now comes with the 18350 tube and a pocket clip for the price. (They used to be add on items)
  • Nichia LED option
  • NarsilM Firmware (Ramping UI with lots of configurable options)

Con’s

  • Step downs from Turbo are large and the light gets beyond warm
  • Breaks connection (Light turns off) if using flat tops and the light is jolted (Doesn’t come back on)
  • Smooth body

Conclusion

For the price this is one of the least expensive Quad LED lights you can get usually (when on sale, see youtube for a coupon). For its size it puts out a ton of light, but at least in this S43 the step down from Turbo to high is quite large and it gets hot! Turbo is more of a momentary because it lasts so little time. I wish it had a bit more grip and didn’t lose connection if jolted hard (Like if using the glass breaker), especially for a light that advertises itself with tactical features.

Xtar X2 Dual Bay Smart Quick Charger Review

Xtar has a new charger on the market the X2 and X4. Today I have a review of the X2, a 2 bay 2A charger capable of charging Li-ion and Ni-MH batteries, with AC or USB Power. Thanks to Xtar for sending this to me to test and review.

Full Image Gallery: https://imgur.com/a/T2ewQ1Z

YouTube Version of this Review: https://youtu.be/MXD3-AGlmew

Packaging

The packaging is a white retail box with a gloss photo of the X2 on the front. The sides list a few key features such as the charging speed, Inputs, LCD display, the chemistries and sizes of batteries that are supported. The back gives more specifications and features of the charger. It contains a scratch off anti counterfeit sticker and is insured worldwide. The package contains the charger, AC power cable, and the manual.

Construction

The Xtar X2 charger is a 2 bay charger that can accommodate most common battery sizes. I had no trouble with all 18650’s, it will fit 2x 26650, and I didn’t have any issues with an unprotected 20700. Smaller batteries were ok too, 18350, AAA, etc. It will not charge a protected 21700 battery. The metal sliders are fairly smooth and have enough tension on them to hold a battery securely.

The body of the charger is a black ABS plastic that is heat and flame retardant, and is kind of in an X configuration, in outside appearance. There isn’t a fan in this charger meaning it’s silent, and I didn’t notice it get warm during use. There is one button on the top, middle near the screen that when held turns the screen off, for night time charging if you wish.

I took some photos of the inside of the charger here. I am not a circuit engineer but to me it looks decent. Quality of the solder joints look good, A few components are not 100% squarely placed but not bad either. I don’t see any cold joints or things that I am alarmed about. If you see something you are concerned about, make sure to leave a comment.

Screen

The screen is a LCD with a dark black background and white text that’s tinted blue with a blue backlight. On each bay you get a 0-100% indicator showing what percentage the battery is at, on the top right corner you get the current voltage, below that you get the charge rate, below that in the center you get the mAh that’s been put into the cell since the start of charging, and lastly on the bottom left hand corner you get the cell chemistry that’s been detected. The screen is easy to read and I had no complaints about it. It does time out after a few minutes, you can press the button to wake it up.

Performance

My main charger for a while has been an Xtar VC4 which I really like, but the problem with it is it’s USB only input power, sometimes if charging performance isn’t what I expect I end up doing the dance of “is it the USB power supply? Or the wire, or something else?” The X2 solves that because it’s a part of Xtar’s AC series, meaning it plugs directly into the wall. You can also power it via MicroUSB if you prefer. For my tests I used the AC power source.

The charger has reverse polarity detection and didn’t charge batteries when they were placed in backwards. Battery chemistry was correctly identified, when you place a new cell in it takes a few seconds for it to go through detection and begin charging.

The charger is capable of a maximum of 2A across both bays. The left bay is capable of up to 2A under the correct conditions, and the right bay is capable of up to 1A under the correct conditions. If there is only 1 battery in the left bay and it’s a lithium ion type chemistry it will charge at 2A. If you have 2 Lithium cells they will each charge at 1A. The charger does a great job of recognizing the type of cell, my smaller 18350’s despite being lithium will charge at a slower 0.5A rate which is great for battery longevity. It detects this all on it’s own and it does this in either bay. You can also mix chemistries across the charger, 1 18650 for example in the left bay and one AA NiHM in the right, it will charge the 18650 at 1.0A and the NiHM at 0.5A.

While slower charging is safer, I would like to see the charger capable of a combined 4A across each bay, for faster charging of large batteries like 26650 and 20700’s etc.

The charger has 0V activation (Although this is generally not recommended for batteries with a Lithium chemistry). For charging it has a 3 step process TC-CC-CV with soft start technology. This helps with overall battery longevity and long term health.

Pro’s

  • All automatic, this make the charger very easy to use but doesn’t give enthusiasts any options on what speed to charge the batteries at. Default settings are conservative, which is safe.
  • AC Power via a fairly standard cable. The charger is compatible with 120/240v so it’s safe for international use. It can also be powered via MicroUSB.
  • Very affordable, at US retailers it’s coming in well under $20.

Con’s

  • Only a combined total of 2A charging speed, while adequate, I would like to see it able to charge 2A per bay in 2019 if connected via AC.
  • I would like to see the USB input be in USB-C over MicroUSB because it’s 2019.

Conclusion

The Xtar X2 is my current favorite 2 bay charger. I really like that it’s got dual input including AC, which makes it versatile to use whatever power source is best for you in your situation. It takes a wide variety of sizes of batteries, and the most common chemistries as well. Xtar has a good reputation around the Flashlight and Vape communities for making quality chargers at affordable prices. The X2 is no different, and continues this trend. Xtar also makes the X4 version of this charger if you want 4 bays. It offers a little faster charging depending on where you put batteries and isn’t much more expensive. Either charger would be great for anyone who is just getting into flashlights or if your just looking to upgrade to a newer/faster charger. I recommend it.

Sofrin Q8 VS BLF Q8 Comparison

Today on my review table I have the Sofirn Q8, this is a version of the well regarded BLF Q8 that I reviewed last year. This review is mainly showing the differences between the two lights. If you haven’t seen my original review of the Q8 you will want to check it out first and then watch or read this review. Thanks to Sofirn for sending this to me to take a look at.

Full Image Gallery: https://imgur.com/a/T3d7H8t

YouTube Version of this Review:

So as you might know the BLF was a forum designed light, it was produced by Thorfire. The contact that BLF had at Thorfire changed employers and went to work for Sofirn. WIth everyone’s permission he was allowed to take the BLF Q8 design with him and Sofirn decided to make a few changes to the light and produce it under their name.

There are 2 significant changes on the Sofirn Q8.

Round Body Tube

On the BLF Q8 there were milled flat’s into the body tube, on the Sofirn Q8 those have been removed, and it’s now purely knurling. I don’t have strong feelings on if this is a good or bad change. The additional knurling does add some additional grip.

LED Choice

The Sofrin Q8 uses the Cree XPL HI LED’s in a 6000k temp. The BLF Q8 uses the Cree XP-L V6 HD LED with a 5000k tint. What does this mean practically? It means the Sofrin Q8 has a slightly cooler beam tint, and throws slightly better because the XPL HI LEDs don’t have a doam.

From a practical standpoint I actually like the slight increase in throw that the light has, in my night shots you will see it’s noticeable but not a dramatic difference. I wish the Sofrin had a tint closer to 5000k but the 6000k isn’t too blue. Overall I think the slight increase in throw is worth it.

Runtime test

I did do a runtime test with the Sofrin Q8 using 4x Samsung 30Q batteries and the graph shape matched the BLF Q8 but overall runtime as a bit shorter. The Sofrin Q8 came in at 325 minutes while the BLF Q8 was just past 350 minutes.

Sofirn https://i.imgur.com/OoIRBbP.jpg

BLF https://i.imgur.com/pS99l3d.jpg

Other then the changes mentioned above the Sofirn Q8 is the same as the BLF Q8. I was a really big fan of this light originally and still am. It’s a fantastic value for a soda can style light, it has the all important tripod mount (Or lanyard attachment point). The firmware is the excellent Narsil so it’s configurable and in my opinion is one of the best ramping firmwares out there. As far as I know most of the BLF Q8 mods should work on the Sofirn Q8. The light does get warm when you run it for an extended period of time but that’s to be expected on a light this compact and bright. Overall I enjoy both lights, if you are looking for a little more throw the Sofirn Q8 is a great choice, both are great lights and I recommend them highly.

Some additional comparison photos, the Sofirn Q8 is on the Left, BLF Q8 is on the Right

Jetbeam FL-12 Review (USB-C, Adjustable LED Fill light for Videography & Photography)

Jetbeam has a new product on the market that is aimed at videographers and photographers but has some application in the flashlight world as well. It’s a small portable fill light, with adjustable tint, and brightness, in a small package that’s made to be mounted on your camera or nearby to provide fill light when videoing or taking photos. Thank you to Jetbeam for providing this for me to take a look at. It’s been on my want list since it was announced.

Full Image Gallery: https://imgur.com/a/5PXLAnS
YouTube Version of this Review: 

Packaging
Packaging on this fill light is minimal. Outside is a retail box, unfortunately mine was damaged a bit during shipping. On the front it shows the light, on the back it gives a runtime charge we are used to seeing. Inside the light is housed in a plastic tray. Accessories with this are pretty minimal. It comes with a lanyard and USB-C OTG cable used to charge the light and it can be used to use the light as a powerbank to charge other devices. More on that a bit later.


Construction
When I first put the Fl-12 in my hands the first thing I thought was, this feels alot like an iPhone. The sides and back are milled from a solid piece of aluminium, and then anodized in a silver. It looks to be very precise. The only downside as with many phones is that it makes it a little slick to hold onto. On the back an area is cut out near what I am going to call the top for a small OLED screen that gives you the status indicators. It displays what tint/temperature the light is outputting, the intensity level (available in 5% increments) and then the estimated runtime at that level and tint.


Cut into the metal bezel is a ¼ 20 threads to allow you to attach the light in a horizontal or vertical configuration to a tripod, a hotshoe adapter or any other place where you can put a ¼ 20 accessory. Also in the side is the USB-C charging port. No silicone cover is provided for this connection which is a little unfortunate as it exposes it to dust, and moisture but most Smartphones follow this method and don’t have a problem.

The front has 120 LED’s a combination of ½ to provide the warmer tones, and the other ½ to provide the cooler tones. They are arranged in a matrix of every other and are even for the most part. They are slightly rearranged around where the threaded insert is inserted. Over the top is a piece of clear acrylic and it shipped with a piece of protective plastic over the top. I am leaving this on mine to provide a bit more scratch resistance.

The back is a solid piece of milled aluminum that has a small OLED screen that’s used to tell you what mode you are in, power level, brightness, tint temp, and estimated runtime. The internal non user replaceable battery is rated at 2600mAh of capacity.

Size and Weight
I measured the Length at 131mm, width at 66mm, and depth at just under 10mm. Weight came in at 142.9 Grams.

LED/Runtime
The exact LED’s used in this are not mentioned which is a bit of a disappointment. It would be really nice to know what the CRI on them is as well. For video and photo work you ideally want a high CRI LED, and these are more of a cri in the 70-80 range I would guess. There are a total of 120 LED’s on the light, with 60 being used for Warm white, and 60 being used for Cool White. The array is fairly even but there is some rearrangement that happened to accommodate other components in the casing.


The light will also run while plugged in to USB-C so it could be nearly endless amounts of runtime if you wanted.

I did 2 runtime tests with this light, both at 100% brightness with one being the warmest temperature, the other being the coolest. So for the 3000k test, total runtime was right at 70 minutes. During this time output gradually decreased despite being at 100%, it lasted 65 minutes at 80% relative output. This is a little better then the OLED screen predicted. The 5500k runtime test was very similar, 70 minutes of total runtime, and the light slipped to just under 80% relative output at about 50 minutes.

UI
UI is very easy on this. You have 4 buttons along the side of the panel, that if it’s mounted to your camera horizontally will be on top. You have a power button, pressing once quickly wakes up the interface, you need it on in this mode to use the OTG charger to charge another device. If you press again and hold slightly the light interface comes up. Here you can preset using the + and – icons which options you are on, press the mode button to select it and then use the + and – to adjust the brightness and tint temp. Press mode again and then + or – to adjust the other. Press the power button once more to turn it on once you have your settings preselected. It’s pretty intuitive when it’s in your hand. You can adjust brightness and tint temp on the fly while the light is on as well to get your perfect exposure.

Charging
The FL-12 comes with a USB-C 3 where the other two ends are a full size female USB 3.0 port, that allows you to plug in a standard USB cable and use the FL-12 as a powerbank to charge your phone, or camera that can be powered by USB. You can’t charge your device and use the light on the FL-12 at the same time unfortunately. The other end allows you to charge the FL-12 via a standard male USB connection if you don’t have a USB-C cable handy at the time. I measured charging speed at 0.8A which isn’t super fast but should be good for the long term health of the battery.

Pro’s

  • Feels well built, and the size is very similar to a modern smartphone
  • USB-C recharging and can act as a powerbank!
  • Nice OLED screen on the back for info & runtimes that the light beats slightly.
  • I like that it can mix and match tints between 3000k and 5500k

Con’s

  • Plastic front panel is susceptible to scratches, I left the protective cover on.
  • I would like to know more on what the CRI is. I would suspect its between 70-80.
  • No cover for the USB-C port, although most phones get by fine without this too, so not a big concern.

Conclusion
I have showed this to a few friends who also do video/photography work and they instantly wanted one. They were both pleasantly surprised at the price point when I told them. It’s around that $50 mark currently with Jetbeam’s website. It’s well built and reminds me a lot of a premium smartphone. My only major complaint is no CRI data is given. CRI is pretty important invideo work, especially if you shooting video of people for something like an interview. My guess is this is somewhere about 70-80 CRI, it’s not bad but could certainly be better. Other then that I think it’s pretty awesome, I plan to use it as a fill light for photos and I may use it as a top down fill for some video content as well. Having a small portable light will come in handy!

Jetbeam has a new worldwide website for sales, they have asked I share a link to the light on their https://goo.gl/GwxgNX (Affiliate Link)

Nitecore TUP Review (1000 Lumens from a Keychain Light?)

Nitecore has a new addition to their keychain/small EDC lights with the TUP. It is capable of delivering 1000 lumens briefly, and has a small OLED screen to let you know what mode you are in, lumens, and how long the light will run in that mode. Thanks to Nitecore Store for sending this to me to take a look at.

Full Image Gallery: https://imgur.com/a/KBMePk5

YouTube Version of this Review: 

Packaging
Packaging is a little different from the black and yellow Nitecore boxes many lights come in. Instead it’s a black box featuring the light on the front with some stats on the back. Inside the light is held in place with a clear plastic shell with accessories below. Accessories include the light itself, the pocket clip comes pre attached, a micro USB cable a manual and associated paperwork and a quick keychain attachment. Nitecore store nicely includes a quick start guide which I find helpful, especially when exiting the “demo mode” the light comes in.

Construction
The TUP features a construction similar to the other keychain lights Nitecore has come out with in the last few years. It’s a 2 piece aluminum clam shell that’s anodized black. It’s held together with T3 Torx screws. I didn’t do a disassembly as it’s been done before by others. In the hand it feels pretty solid, the buttons have a nice click to them and the OLED screen is mounted flush with the body body. The buttons are almost too easy to press, so using lockout mode is a good idea. I would expect the aluminum and screen will scratch if you did decide to put this on your keys as that’s a pretty rough environment. On the back of the light there are 2 small rings where you can attach a ring to then attach it to your keychain via your favorite method. The clip is large and substantial on the back side of the light. It allows for a deep carry if you desire to use carry this in your pocket. Overall it feels pretty solid for a clamshell type light.

Size and Weights
Length is 70.3mm, width is 26mm and thickness is 25mm at the head without the clip. Weight is 53.2 grams. The light is IP54 rated meaning it can withstand dust, and splashes of water.

Nitecore says this is a keychain light, and while you could use it for that I feel it’s thickness makes it less then Ideal for that in my opinion. I would use this more as an EDC then a keychain light. Compared with the Nitecore TIP you can see how much thicker the TUP is by at least 50%. Even the TIP is larger then I want to carry on my keys. For the last several months the Olight i1R has been my keychain light because of it’s small size. Comparing it to a normal household key it’s just a little longer in length but it’s the depth that sets this apart.


LED/Heat/Runtime
The Nitecore TUP uses a Cree XP-L HD V6 LED in cool white. It’s reflector provides for a hot center and minimal spill, kind of similar to a TIR style optic. The front lens is plastic which I would have some concerns about scratching if used on a keychain. Since Turbo only lasts for 30 second heat isn’t a factor here.

Runtime I measured on high, at 200 lumens which was pretty consistent for 3.5 hours starting on high of 200 modes and having it step down as the 1200mAh battery depleted. LVP kicked in at 2.9V according to the voltage on the OLED display. I didn’t do a runtime test on turbo because you can’t lock it on, it’s basically a momentary mode only and only for a max of 30 second at a time. You can retrigger this several times but the output will decrease as the light heats up and battery loses voltage.

UI
This light ships with 2 UI, the default being “Demo” mode. Given the package is a sealed box without a window, I can’t think of a legit reason why the light has a demo mode, and why it would be the default. Nitecore says this is for EDC use, but I would prefer to manually turn the light off, if my task takes longer than 30 seconds. For practical use the user needs to switch it into normal mode by pressing both buttons at the same time while the light is off.

Normal mode is more straightforward and what you would expect. The light starts in moon light mode and linearly goes up. Moon mode is 1 lumen, then 15 lumens, 65 lumens, 200 lumens, and momentary turbo of 1000 lumens. The light has memory in this mode and will remember where you were last at. It has 2 buttons, basically a power and a mode button.

The light has direct access to low and Turbo. To access low, when the light is off (and not locked) press and hold the power button to access 1 lumen mode. To access tubo press and hold the mode button, and this is in momentary.

The light also has 2 lockout modes. Lock 1 is half lockout mode. It locks the power button but if you press and hold (about 1 second) the mode button you get access to turbo. To exit lockout you have to hold both buttons at the same time. In lockout mode 2 the light won’t turn on until unlocked.

Recharging
Recharging was accomplished with the included MicroUSB cable. The internal non replaceable cell is rated at 1200mAh by Nitecore. Charging speed from the LVP at 2.9V was right at 3.5 hours at a rate of 0.5A. This is an appropriate charging speed for a small capacity non replaceable pouch style battery like this. The light is able to turn on while charging or being powered from a USB power source.

Carry
The TUP is a bit of a fatty, It’s really not that much larger then a lot of the CR123 based lights such as the Olight S1R II, or my 4Sevens MiniMK Turbo, but I just don’t like it as well for a front pocket EDC. I think it’s the square vs rounded shape. The Clip on the TUP is substantial and should hold up pretty well. As a keychain light in my opinion it’s too thick. Length is ok, but it’s just more bulk then I want on my keys that sometimes end up in my front pocket. I think the size would be ok if you always put your keys in a jacket pocket or purse where overall size isn’t as important.

Pro’s

  • Is able to power on while charging/running off a USB power source.
  • I like the OLED screen that shows lumens and estimated runtime. If this proves to be durable more lights should have it.
  • Nice beam pattern that throws quite a ways for a small light.
  • Great clip and construction, makes for a great hat light.
  • Large 1200mAh battery

Con’s

  • Buttons are too easy to press meaning lock mode is recommended highly.
  • I would prefer having to hold lock mode a little longer so it’s not triggered accidentally.
  • Turbo of 1000 lumens that works in momentary only isn’t quite the same as one you can lock on
  • It’s too large for a keychain light, at least on my keys.

Conclusion
The Nitecore TUP is the largest of the keychain style lights from Nitecore and for me it moves out of that keychain style light into the gray area between categories. You could use it as an EDC, it’s similar in thickness to some CR123 based lights but the square ish edges makes it seem a little larger. The clip is good and allows for a deep carry in a pocket or it makes it easy to clip on to a hat. It provides a solid runtime for this and a variety of modes. I just find myself reaching for a dedicated headlamp most of the time though.

We saw on the TIP Nitecore offered a high CRI version with a warm tint, my hope would be they offer the TUP with this as well in the future because I have a personal preference to high CRI. The screen makes the UI easy to use on the TUP and I think it would make a nice complete gift as you know what’s going on by looking at the screen vs knowing a blink pattern for lockout mode or low battery indicator.

—————————————————————
This might be my last review & Video of 2018 (or I might get one more done next week). It’s been a good year, a busy year too. I made a total of 65 videos and reviews (Not all were flashlights, but most were). Let’s see what 2019 holds.