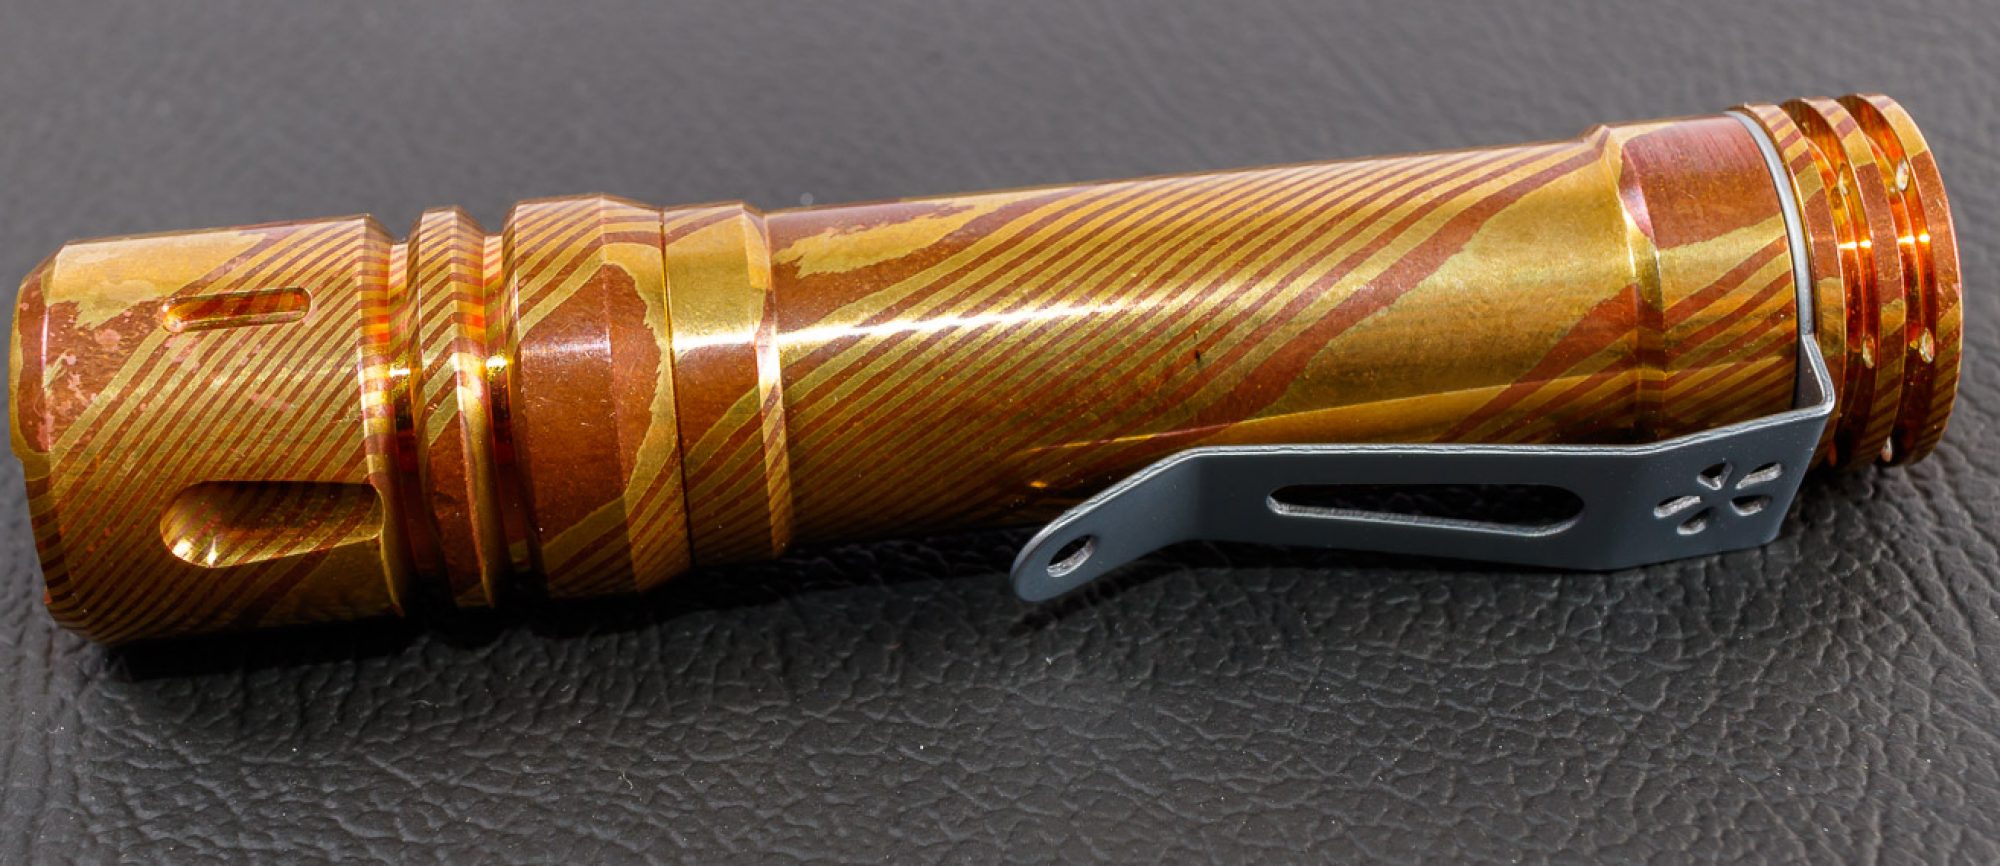
Olight Warrior Mini Recall News!

Here is the link to the official Facebook group post on the matter https://www.facebook.com/groups/Olight/permalink/3455317721188648

See my review of the Olight Warrior Mini at https://youtu.be/k-kKoWlt9Mk

Buy Me a Beverage at https://www.buymeacoffee.com/Liquidretro

Follow me on Patreon https://www.patreon.com/user?u=19916244

Join the Facebook Page: https://www.facebook.com/LiquidretroReviews/

Follow me on Instagram https://www.instagram.com/liquidretro/

Follow me on Twitter https://twitter.com/liquidretro

Find all my social media at https://linktr.ee/liquidretro

Follow me on LBRY.TV at https://lbry.tv/@LiquidRetro:5


Klarus XT11 GT Pro Review (2000 Lumens, Cree XHP 35 HD, USB-C,18650)

Today I have a newer light from Klarus the XT11 GT Pro. This is an update to a light that Klarus has made previously. Klarus (Affiliate) sent this to me earlier in the year for review, and I appreciate their patience as it took me a little while to get to it. 


Watch this review on YouTube: 

Follow me on Instagram: https://www.instagram.com/liquidretro/ 

Join the Facebook Page: https://www.facebook.com/LiquidretroReviews/ 

Enjoy this review? Buy me a Coffee: https://www.buymeacoffee.com/Liquidretro


Pickup the Klarus XT11GT Pro at Amazon https://amzn.to/2MqwsgY


Construction

The XT11GT Pro is made from aluminum and is anodized in a smooth medium gloss black anodizing. Visually it’s different then the standard XT11GT. It features the same tactical tail cap, with the large center button being a mechanical switch with a grippy silicon cover and the paddle on the side to allow for mode selection. The paddle was upgraded to aluminum here for incredibility. The clip is a clip on, non fixed and rotates around the body of the light. It’s not deep carry with it leaving about 32mm exposed from a pocket. 

The body is milled with small horizontal lines going around the body of the light and then it has small relieves milled in. It’s a nice change from traditional knurling and provides a good amount of grip. The threads are nice and square cut and it’s a dual wall construction. The head and body tube appear to be once piece. As we get to the head of the light it grows in size, It’s got a built in anti roll ring that adds some style and nicely disguises the USB charging port cover. This is definitely one of the better designs I have seen for this. 

The bezel is a little aggressive and the outer edges have some sharper sides. It’s a gunmetal color and stainless steel I believe. It’s easily unscrewed by hand. Inside is a anti reflective coated glass lens, a fairly deep smooth reflector 


Size and Weight

I measured the length at 139mm, minimum diameter on the body at 25mm, maximum diameter on the head at 35mm. Weight with the included battery and clip was 169.2g. 

For an 18650 light it’s a little on the long side, but that’s not unexpected with the deeper reflector. Here are some comparison shots with the light and some others.


Retention

Your 2 Retention methods on this light is with the included pocket clip. Unfortunately this isn’t deep carry carry with about 32mm of the light exposed if you do decide to use the clip. With the size of this light that’s ok, as I think it’s more of a bag or coat light myself. The included holster does the job pretty well too, no complaints there. 


LED & Beamshots

The XT11 GT Pro is using the Cree XHP 35 HD LED in cool white at 6500k. This is an interesting choice of LED”s since it’s officially been discontinued by Cree. That said plenty of existing stock still exists and Klarus must feel like they have enough to meet the expected demand of this light. The beam it’s self is a good all arounder. The deep smoother reflector means the light has a fairly small hotspot and it throws pretty well but there is also spill to allow for short and medium range light. So a good all around beam. 

The light will run on 18650 batteries which is how I will use it, but it will also run on 2x CR123a batteries which is nice as a backup. As a result the working voltage is 2.8V to 6.4V/ No PWM was observed. 


Runtime & Heat

I measured runtime with the included 3100mAh battery. Turbo runtime was 50 seconds before stepping down to 90% and then it ran for another 2 minutes 10 seconds before settling at 30% relative output where it ran for an additional 1:37:00. Total runtime was 2 hours. Max Heat I saw was 42C at 1:35. 


UI

Like many of Klarus recent lights this has 2 modes of operation, a Tactical and a Outdoor setting. The tactical mode allows the main button on the rear of the light to go to turbo, and the paddle to be a shortcut for strobe that you can lock on by holding for 2 seconds.

I primarily tested the light in it’s outdoors setting though. When in this setting the primary button on the rear is a shortcut to turbo both as momentary or locked on. Once on you can use the paddle to decrease the modes from turbo, high, Medium, and low. You can also use the paddle when the light is off to start in moonlight mode and then increase in output for each push. It’s a system that works better then I expected and is pretty intuitive once you use and get it.  


Recharging

One of the updates the XT11 GT Pro has is USB-C charging. Unfortunately it doesn’t support USB-C to C or USB-C PD charging. So you need to use the supplied (or similar) USB-A to USB-C cable to charge the light. The port cover here is nicely shaped and fits well into the side of the head. It’s one of the better executions I have seen of this in 2020. 

I charged the included 3100mAh battery from LVP to full in a total time of 3:23:10. It wasn’t the fastest charging rate, as the maximum I saw was right at 1A. There is a small LED indicator light built into the side of the light to act as a battery charge state indicator. Green is anything more then 70%, orange is between 30-70%, and red is less then 30%, red flashing is less then 10%. 

Packaging

My light is a super early production light (Serial number 17), and doesn’t have a box so I can’t comment on that. I can tell you the accessories it came with. My light came with a 3100mAh button top protected IMR 18650 battery, a Klarus branded lanyard and a USB-A to USB-C charging cable. It also came with a nylon, Klarus branded holster. It has a Dring and velcro belt loop. It seems to be solidly made. 


Pro

  • I like the outdoor UI setting here once you get the hang of it but it’s a little different.
  • Nice size in the hand for an all around light if you want your buttons on the rear.


Cons

  • Seems expensive
  • Cool white only
  • No true moon light mode, lowest is 10 lumen output
  • No USB-C to C compatibility and slow charging


Conclusion

My conclusion for the Klarus XT11GT Pro is that it’s a good all around light general purpose light. The 2 UI modes allow you to use it tactically if you want or use it in the outdoor mode which is more appropriate for everyday uses like power outages and camping. The beam is useful with enough throw and spill to do both jobs pretty well. What I don’t care for is the asking price I am seeing at the time of filming. It’s high in my opinion currently. Around $50-60 would make it a good value but at nearly double that I would struggle to pay full price. So if you’re interested I would watch for a sale or coupon. 

Olight Baldr Mini Review (600 Lumens, Green Laser)

Today I have Olights newest compact mountable light the Baldr Mini that features an integrated green laser designed for your smaller weapons. Thanks to Skyben for sending this to me to look at a review. 


Watch this review on YouTube: 

Follow me on Instagram: https://www.instagram.com/liquidretro/ 

Join the Facebook Page: https://www.facebook.com/LiquidretroReviews/ 

Enjoy this review? Buy me a Coffee/Beer: https://www.buymeacoffee.com/Liquidretro


Pickup the Olight Baldr Mini at Amazon

Black: https://amzn.to/3aKgxEr 

Desert Tan: https://amzn.to/3hn9OkM


Packaging & Accessories

The Baldr Mini comes in a standard high quality Olight white cardboard box. For a tactical product it’s a very non tactical classy box. Inside you get the light itself, the MCC (Special) magnetic USB Charger, and the adjustable rail insert, screws, and a small torx wrench to make this change to accommodate your mounting needs. By default it comes with the Glock sized adapter installed. 


Construction

The Baldr Mini follows similar design ques from Olight’s other pistol mount lights, the one it’s most similar to is the PL-Mini 2 Valkrie 2 which I also did a review of. The Baldr mini is Olights line of lights that feature a laser integrated into them. The light is made from aluminum and features the same mounting system as The Valkrie 2, which has a nice quick disconnect tool less lever, and then a rail design that allows the light to slide forward or backward to get it positioned exactly where you want it. This is one of the better mounting designs in my opinion from the different weapon lights I have tried. 

On the back you have very similar buttons that hinge down that Olight has had since the PL-Mini. They are silent and work pretty well for my fingers. Your other control is a slider under these buttons that allows you to select between laser only on the far left, laser + light in the middle, and light only on the right. On the far extremes this slider doesn’t stick out to catch at anything either. At the front you have a larger 17.8mm glass lens with a smooth short reflector. What’s different here is the laser is integrated right above the main LED so there is a notch out of the reflector. 

The depth of the light is 4mm greater then the PL-Mini 2 to accommodate that laser which is ok with me. At the bottom you have the magnetic Olight charging base, the polarity on the magnet here is different from standard Olight flashlights, and require the use of the “Special” MCC chargers. On the side panel you do have 2 adjustment screws to adjust the aim of the laser to match the Point of impact. You have elevation and windages adjustment screws. For me I didn’t have to adjust these much to get them close to shoot at my indoor range. 

Size & Weight

I measured the length here excluding the buttons at 48.75mm, width at 27.25mm, and height at 36mm. I measured the weight at 86.1g. This is 13..1g more then the PL-Mini 2. The Baldr Mini is IPX4 water rated. 

Small bit on retention, due to this lights slightly larger size it won’t work with holsters you already own for other Olights. 


LED, Laser, and Beam Shots

The exact LED in use here isn’t specified but I can tell you it’s cool white with a maximum of 600 lumens and capable of throwing out to 130 meters. I would guess tint is about 6000k. The beam is slightly smaller then the PL-Mini 2. I expected beam distortion due to the hole in the lens from the laser but it’s really very minimal and only noticeable at short distances of less then 10 feet. 


Runtime

Internally the light has a built in non user replaceable 230mAh battery. I did 3 runtime tests, in all 3 modes. So for the light only mode the light lasted out to 48 minutes, you got near peak runtime till 0:2:30 minutes and it looks to have a timed step down to around 18% which is substantial. 


Light only mode looks like a similar curve but just longer, it adds another almost 20 minutes of runtime for a full runtime of 48 minutes. I used the same techniques to measure the laser only mode, and while I don’t know that I trust the output graph to measure % of relative output, I do trust the runtime data. Total runtime was 2:28:00.


UI

The user interface here is very simple, with the two paddle switches at the rear of the light doing the same thing. There is no strobe mode on this light. On the very bottom you have a 3 way slider switch to allow you to select between Laser only on the left, laser + Light in the middle and Light only on the right. This switch has nice positive detents and I don’t think it will easily slide on accident. 


Recharging

Recharging the internal 230mAh lithium polymer battery is accomplished via the bottom magnetic recharging system that Olight uses on most of it’s other lights. However here the magnetic polarity is reversed like it was on the PL-Mini, and PL-Mini2. I believe this is due to the small battery and slower charging rate it requires. Charging time from empty took a little over 40 minutes to complete with the max charging speed at 0.35A. 


Conclusion

My conclusion on the Olight Baldr Mini is that I appreciate the addition of the laser for a minimal penalty of weight and added thickness. I thought the laser in the lights main reflector would negatively impact the white light output here but it’s really minimal and you don’t notice it. For me it will replace where I was running the PL-Mini2 on my Glock 19 and the Baldr Mini will go on instead. If you plan to put this on a carry gun or something you need a holster for make sure you can find holster support before purchasing. Hopefully Olight will get more holster manufactures onboard for future lights in 2021. 


I will have a link to where you can pick this up on Amazon from Skyben in the description below. If you have any questions or comments please let me know in the comments below and I will see you on the next video review! 


Pickup the Olight Baldr Mini at Amazon

Black: https://amzn.to/3aKgxEr 

Desert Tan: https://amzn.to/3hn9OkM

Wuben Gecko E61 Pen Light (Giveaway, Multifunction Pen, 130 Lumens)

Today I have something a little different: a multifunction penlight from Wuben. It has white, red, and blue LED’s, ink pen, glass breaker, and a stylist attachment. Stick around because I am going to be doing a giveaway of the E61, so make sure you watch the video to see how to enter. Thanks to Wuben for sending me the E61 to review and an extra so I could do a give away. 


Watch this review on YouTube: 

Follow me on Instagram: https://www.instagram.com/liquidretro/ 

Join the Facebook Page: https://www.facebook.com/LiquidretroReviews/ 

Enjoy this review? Buy me a Coffee: https://www.buymeacoffee.com/Liquidretro

Giveaway Link: https://www.instagram.com/p/CJCGn5XjANt/


Pickup the Wuben Gecko E61 on Amazon at

Black: https://amzn.to/38q95LA

Blue: https://amzn.to/3mBG5pl

Or from Wuben Direct https://www.wubenlight.com/products/wuben-e61-gecko-multi-functional-tactical-pen-edc-flashlight


Packaging & Accessories

Packaging here is quite nice, you have a black sleeve around a blue bifold box, with a Wuben logo in the middle. The lid is magnetic on the sides to keep everything nicely together. Inside all the accessories are in small boxes, it’s a impressive package for a pen. 

The E61 Gecko includes quite a few accessories, You get the pen body itself, a manual, micro USB Charging cable (Short), 4 different tips (Stylus, glass breaker, ballpoint pin, and inkless point). 


Construction

The light is made from aluminum and is anodized in a black or blue finish. I have the blue here but will be giving away the black version. Instead of being round like most pens, this one is more rectangular. At the pen end it has an area milled that allows the head to be pulled out of a detent and then rotated into to swap from the ink pen to one of the other available tip options. 

In the middle of the pen there is a circle that is magnetic. It’s strong enough to hold the light up in horizontal and vertical positions, and is a good balance point to allow it to spin, so kind of a fidget toy too. This allows the pen to become a mini work light too with the light bar folded out. 

The clip here is machined out of a solid piece of aluminum and is attached via the pivot mechanism the light portion is made from. It has a small place that looks like a tritium tube would fit my my 1.5mm x  6mm are too big, so possibly something smaller would fit. The clip allows for deep carry and has good retention in jeans and other pants I tried. 

The light portion is on the top back of the pen and folds out from the top. It has 270 degrees of rotation, with detents at 90 and 180. It stays in place but there is a bit of what I would in the knife world call blade play which is unfortunate. The light is allowed to shine through the opposite side of the body too.


Size and Weight

I measured the size and weight of the pen, as it came to me in the box with the glass breaker tip installed at 51.3g. Overall length when closed was 142mm, length when open is 215mm. Diameter is roughly 14mm by 10.5mm. It’s a little slimmer diameter to a Sharpy marker.


Here are some comparison photos to some other EDC Pen’s I have.


As a Light

The light here has 5 LED’s on it’s light bar all behind a diffusing piece of plastic. Instead of using RGB LED they went with individual LED’s for each color, white, red, and blue, with 2 white LED’s for more output and more even light. 

Output levels are 3 lumens, 30 lumens, and 130 lumens according to Wuben. This is powered by an internal  120mAh lithium polymer battery. Runtime follows the voltage curve of the battery pretty well, indicating this isn’t likely a regulated driver. It also doesn’t have low voltage protection so keeping the battery on the fuller side would be better for health. ON high the light got about 2 hours of runtime before it hit 10% relative output. Heat isn’t an issue here. 

The user interface is pretty simple here, single click to turn on, and long press to cycle though the 3 white modes. The light starts on Low, Med, High, and does have memory. Single press turn off at any point. To get into the flashing red, blue, red/blue mode, double press when on or from off. Single press to turn off. Memory does remember the flashing modes too. 


The light is rechargeable via onboard microUSB. When charging the switch on the outside of the light will turn red, and then blue when charged. I measured charging speed of the internal 120mAh battery at a wopping 0.10A. Total charge time was 53 min and the curve was flat. 


As a Pen

The Wuben E61 Gecko is a light duty pen in my opinion. That’s mainly due to the small size of the cartridge 22.5mm in overall length. This doesn’t leave much room for ink about 9mm of visible ink in my cartridges. The good news is here that the cartridge is a pretty standard design ballpoint design, so you can find things that will fit in your average Bic pen, or hotel pen, but to use these you need to first write 90% of the pen so you can cut the empty tube and it will fit. In the hand it’s ok, it’s not the worlds most comfortable pen, but for short uses it does the job just fine. I like the diameter here better then say the Olight Open which I will review in the next few weeks. 

Don’t forget the other accessories on the opposite side of the pen too, you have a metal scribe tip, a ceramic ball for a glass breaker, and the stylist tip. These may end up being a little more practical depending on your use case and the ink pen may become a secondary for you.


Pro’s 

  • Non proprietary ink cartridge but it will require a bit of customization.
  • The light bar function here is more useful then your average pen light, especially with the side magnet making it an actual usable light.


Con’s

  • It would be nice to see USB-C here.
  • Very small ink cartridges.
  • Pivot points seem to use a proprietary head design.


Conclusion

I like that this isn’t a tactical first pen light, It’s pretty usable for everyday, although with the very small ink cartridges I wouldn’t want to do tons of writing with it or you will be swapping in new cartridges frequently. So like a lot of pen light designs it makes compromises on both the pen and the light side. The weight here is nicely balanced so that when using it, it doesn’t have a lot of weight at the back end which is good. 

As a light it has a fairly even beam in white mode and is fairly decently diffused. It’s L,M,H which is good, and double click to get into the colored strobe mode which is good. I just kind of question what you would practically use the red, blue, red/blue strobing modes for practically, maybe to get someone’s attention on the side of the highway? 

Let me know what you think of the Wuben Gecko E61 in the comments below, and don’t forget to visit my instagram @Liquidretro to enter the giveaway to get one for yourself. 

Klarus WL1 Review (550 Lumen, LED Worklight, White & Red, 180 degree rotation)

Today I have a new light from Klarus the WL1 Work light. This is a COB LED light with white and red LED, on an arm that rotates and pivots to allow you to place the light where you need it while working. If you have an old “trouble lamp” this is the 21 centuries answer, it’s battery powered, and USB Rechargeable. Thanks to Klarus for sending this to me. If you do any type of work on your car or house you will definitely want to stick around and watch this one. 

Pickup the Klarus WL1 Worklight from Amazon at https://amzn.to/3oXYhuR


Watch this review on YouTube: 

Follow me on Instagram: https://www.instagram.com/liquidretro/ 

Join the Facebook Page: https://www.facebook.com/LiquidretroReviews/ 

Enjoy this review? Buy me a Coffee: https://www.buymeacoffee.com/Liquidretro


Packaging &  Accessories

Packaging here is nothing special, it’s a lightweight cardboard box designed for hanging retail. A nice photo of the light is printed on the front along with some detail all around. Inside the light is held in a plastic carton that’s fit to the light itself. Accessories include the light itself, a USB-A to Micro USB cable and a manual. 


Construction

The WL1 is made from plastic, and it’s in very Makita-like colors. It’s a solid feel but there are mold marks in various places and there doesn’t feel like there is a lot of glass reinforcing inside. The back has a rubberized grip that houses the switch, LED indicators, and above the USB port cover. The top’s silver plastic house 4 screws that I assume has some metal inside to reinforce the hinge mechanism.


The light bar itself is made of black plastic and folds out a full 90 degrees. It then is able to rotate clockwise 90 degrees so that the COB LED’s face outward when it’s in its most compact form. It can hold any position between this and does so with friction, there are no detents. The clear lens here is plastic.

On the bottom you have a fairly strong magnet that is more then capable of holding the weight of the light in any position. The sticker here that covers the sticker on mine is pretty easily scratched.  There is also a metal hanger that works well to hang it on a branch, wire, rope, or ledge. There is also a hole to allow the spot on the end of the light bar to poke out to use kind of like a normal flashlight.


Size & Weight

I measured the length at 151mm in the folded position, and  the length in the unfolded position of about 325mm. I measured the weight at 171.6g. I don’t have another light thats similar to this to really compare it too but I did put a Convoy S2 for size comparison. The light is IPX5 water rated. 


Retention

On the bottom you have a fairly strong magnet that is more then capable of holding the weight of the light in any position. The sticker here that covers the sticker on mine is pretty easily scratched.  There is also a metal hanger that works well to hang it on a branch, wire, rope, or ledge

LED & Beam

The Klarus WL1 has 2 LED sources on this. First you have the main COB LED’s that provide your area lighting. No specific LED is mentioned here but the tint is 6500k, and produces a maximum of 550 lumens, with the other modes coming in at 220 and 22 lumens each. This same COB also has a red mode and produces 30 lumens which is fairly bright. Lastly there is a red blinking mode which no output is given but i would guess it’s the 30 lumens. Both in red and white modes the COB LED is quite even light, but the beam itself is more an ellipsis beam pattern. You do have a hard cutoff at the edges and there is distortion in color at the very edges. Neither are fantastic but for a work light I didn’t notice it during actual use. 


The light also has a single 5mm LED on the end of the boom, no data is given here and it’s not very bright. 


Heat & Runtime

The light has an internal 2000mAh battery, no size is mentioned but I would guess it’s an 18650 just given the size of the light. If so it’s a little disappointing it’s kind of lower capacity. The white light has 3 output modes, I did my first runtime test in high or 550 lumens, and the light was able to hold t his for about 5 minutes before stepping down to 90% relative output slowly. From there it stepped down again to about 50% relative output and then was pretty linear with the battery decline out to 2 hours of total output. Medium mode it was able to sustain 80% or greater out to 2:15:00/ Total runtime was 3:46:00. 


Red outputs were stable throughout, there was a small amount of almost continual design through the curve here. The light was able to sustain 80% relative output or better for the first 5:30:00 of runtime. Total red runtime was 6:45:00. Heat during both types of light was not worth measuring. 


UI

UI here is ok with some room for improvement. The button ison the rear of the right and flash with the grip. From off the light turns on in medium mode, a quick press again goes to high, pressing it again goes to low. Pressing it again goes to red, then to blinking red. Then back around. There is no memory so each time the light is off it will reset to medium white. If you long pres from anywhere the light switches to the LED on the end of the boom, and it has 2 modes. I think this could be improved by making red a double click, and have the light be L,M,H. 


Recharging

Charging on the WL1 is accomplished via a microUSB port on the back of the light just above the button. It’s a really linear curve, and not the typical charge curve I see for a battery. Total charge time of the internal cell was 3:58:00 so a fairly low charge rate. The first 20 minutes or so started out at 0.85A but then decreased from there. 


Pro’s

  • Priced around $30 at the time of filming
  • Built well for the price
  • Useful amount of area lighting
  • Magnetic base with hanger


Con’s

  • UI here could be a little better, I would have preferred the white light start with L, M, H. 
  • Cool white only
  • Could be a higher capacity battery or user replaceable.


Conclusion

If your current work light is a light bulb in a cage on an extension cord, or old school halogen bulb on stands the WL1 is a nice portable replacement. I found it really helpful when I did an oil change both under the car and in the engine bay. It’s not the best beam or tint but it’s a work light and it does a nice job at a pretty affordable price with a 1 year warranty from Klarus. 

I think this would make a nice Christmas gift if you have someone who likes to work on cars in your life, or likes to do projects around the house too. The portability to attach it magnetically to surfaces and then twist the light to exactly where you need it is nice. 

Pickup the Klarus WL1 Worklight from Amazon at https://amzn.to/3oXYhuR

Olight Olantern Review (360 Lumens, Flicker Bulb, Olight Fan Request)

Olight Olantern Review (360 Lumens, Flicker Bulb, Olight Fan  Request)

Today I have the Olight OLantern, before you change to the next video, this isn’t a boring battery powered lantern. It’s the result of numerous requests to Olight, so lets see if they delivered what the fans really want or not. Thanks to Skyben on Amazon for sending me this to look at and allowing me to tell you the truth on it. 


Watch this review on YouTube: 

Follow me on Instagram: https://www.instagram.com/liquidretro/ 

Join the Facebook Page: https://www.facebook.com/LiquidretroReviews/ 

Enjoy this review? Buy me a Coffee/Beer: https://www.buymeacoffee.com/Liquidretro


Pickup the Olight Olantern from Skyben on Amazon.

Green: https://amzn.to/3lQkiKh

Gray: https://amzn.to/2VXfb0x

Red: https://amzn.to/2VMjQlL

XANAD Case: https://amzn.to/2KABHqb


Packaging & Accessories

Olights packaging is the nicest in the production flashlight world, it makes me wonder how much extra goes to packaging. The lantern is a big heavy duty cardboard box with photos of the light on all 4 sides. Very little information is on the exterior. It opens up throughout the bottom and is a tight fit. It sit’s on the box of accessories which include the manual, a microfiber cleaning cloth, an extra long MCC3 charger capable of up to 2A, and the flame flicker bulb. 


Construction

The lantern itself is made from a polymer front top top bottom. It’s available in a gray, red, and the green you see here. A rubber texture has been applied to a few areas for extra grip, the top cap, and bottom tail cap. The middle section is a hard thick, dense polymer. The lens or globe is a clear acrylic and while it will scratch it seems to be reasonably scratch resistant. It has a bit of a reflector built into the to help distribute light. This globe twists off from the body to allow you to swap out the emitter from cool white to the flickering flame, and there is a oring around this connection. Inside around the emitter is aluminum as is the blue ring around the exterior.

The electronic button is in the front and and has a slight backlit edge. This servers as a power indicator and helps you find the light in the dark. The light is motion sensitive so once you pick it up it comes on. 

The bottom rubber piece is scalloped and relieved internally to allow the light to charge while standing up with ease. There are 3 screws in the bottom that allows the light to come apart fairly easily. While the battery isn’t designed to be user replaceable it is quite easy to remove it. It connects to the circuit board with spring loaded pins. There was some debate early on if this was a rebranded product or an Olight original design and after looking inside I am confident it’s an Olight design, as all the circuit boards do have Olight copyrights on them. Internally its pretty simple design. 


Size & Weight/Competition

Length with the handle folded in was 135mm, with it unfolded 191mm, maximum diameter on the base was 65mm. I measured the weight at 346.5g. Water rating is only IPX4. So it can handle splashes from all angeles but no more.

A lot of people will compare the Olight Olantern to the BLF/Sofrin LT1 because the lights end up being near the same price. The Olantern is lighter, and smaller, with less features, a more simple but less useful UI, and longer charging time. The two are in different leagues really. The Olantern is probably better to hand to a non enthusiast and in terms of weight but in almost all other aspects the LT1 in my opinion is the better lantern. 


Retention

The lantern has a handle that is a metal hanger and coated in the same rubberized coating, at the top it has a plastic piece with a dip in it. This looks a little funny but is actually really useful, as it allows you to hang the light on a wire or rope and not have it fall off. I could see this being used in a tent, or with a rope strung between a few trees while camping etc. 

I do enjoy a case for my BLF LT1, and the OLantern will fit in the one I have for my LT1 here but with a good amount of extra space leftover. The XANAD case does double duty well.


LED & Beam

The Olantern has 2 LED Modules, first the primary is a cool white module with 3 output settings. No emitter or tint data is given for either. It’s quite cool white my guess is 6500k or cooler. The beam is pretty even but if you wanted to diffuse it even more I have seen people put thin paper inside the globe for more diffusion. 

The other is the flame module, it’s 1 mode only and flickers, and is quite warm, with an orange tint. I really wish this had more output and 3 modes like the main module did. 


Olight lists the official outputs as the following.

  • High 360 lumens
  • Medium 120 lumens
  • Low 30 lumens
  • Flaming Module 1 Lumen


Heat & Runtime

I tested runtime on the highest output on the main cool white module, and got 6:55:00 so a little better  then what it’s rated for. During this time it decreased in output ever so slightly but ran this entire time at 90% of relative output which is good. It does get a little warm during use, especially around the blue metal band, with peak temps in my uncooled environment at 39C. This was around the 2 hour mark.


My flaming module runtime test fell a tad short of the claimed 80 hours of runtime. I recorded only 46:42:00, due to the length of time this took I didn’t run this one again to see if my results improved. 


UI

The UI here is very simple. Single press turns the light on to the last mode it was used in. Long press to go to the next mode, and mode progression is L, M, H. There is no short cut to the highest or lowest output. The flaming module has only one mode, so it’s just on or off.


One kind of neat and useful feature is the illuminated halo around the side switch, it reacts to motion to help you find it and to save power, so if you bag was to move it was in or you pick it up but can’t find the button in the dark it will start glowing a dim green so you can find it. 


Recharging & Power

This light runs off of a proprietary battery pack consisting of 4x 1900mAh 18500 batteries for a total capacity of 7600mAh. This is a custom battery pack and is designed to be non user replaceable. As mentioned above it’s quite easy to get into the light however though so if Olight made this battery available as a replacement I think it’s something the average person could replace. Recharging is done via the Olight magnetic MCC3 charger you get on recent Olights. It will operate while charging, and has the standard green when charged, red when charging. 


Charing time here is very long, from empty where the light shut off I measured it taking a full 8:30:00  to recharge, Peak charging speed I saw was 1.38A. This is a pretty conservative recharge rate. If you were charging off solar power it would be best to top up then expect to get a full charge in a day in most places. Comparing this to my BLF LT1 which had a capacity of 12,000mAh but charged in 10:15:00. This is still along time but also a battery that’s 4,400mAh larger.


Areas for Improvement

I see 3 major areas that olight can make improvements to on the next Olantern. The first is the waterproofing, this is only rated for IPX4 which means it can repel splashes from any angle but more then this may cause problems. This means it’s ok in the rain but isn’t to be submerged. The lantern only has one Oring between the globe and module, this surprised me for the price point the lights at, and Olights usual good build quality. 


LED Tint – This shouldn’t surprise anyone if you know Olight you know they like that cool white tint. They might say that’s for the best performance, or most amount of lumens but in this case neither are the most important, quality of light and runtime are the big things you want for area illumination. With the replaceable “bulb” design Olight could easily come out with an addon or have given people the choice. Even better make the tint variable like the BLF LT1. 


LED Storage – The flaming “bulb” is fun, but it’s output doesn’t make it super useful for more then just ambiance. The problem I see is there is no way to attach the extra blub to the light, or store it, so I see it is more likely to get lost. Hopefully version 2 corrects this. 


Conclusion

Lanterns are not something you think you need, till you have one and then if you are like me you will find yourself using it more and more. It’s great for camping but also if you lose power frequently or live in an area with storms. This is great for those areas getting hit by tornadoes and hurricanes or this time of year blizzards. 


At first I wasn’t impressed with the design here from the photos, I didn’t find the light attractive and was kind of put off by the mostly polymer construction, but once I got it in hand it felt better built than I was expecting. That said this is a space that has competition in it, not only from other lantern or lantern like products but also from silicone cones to put on top of your existing flashlights to act as a diffuser. All of those make the normal asking price here hard to swallow in my opinion. It’s a useful amount of light and it feels solid in the hand but I just had higher expectations for the normal asking price.

I don’t think this is the light that the hard core Olight fan was asking for but it’s not a bad place to start. Hopefully Olight decides to make some revisions and come out with a version that is has the ability to shift the tint, swap in other bulbs, is more water resistant, and is a better overall value. If they do that I think it will appeal to more enthusiasts and be the light that the hardcore fans really wanted. Until then you have a pretty well built light for the mainstream at a high price point when it’s not on sale. 

Nitecore MH12S Review (1800 Lumens, USB-C PD, 21700)

Today I have the Nitecore MH12S, this is a new model in a long light of MH series lights from Nitecore. It’s marketed as multitask hybrid series light. It produces 1800 lumens, contains a 21700 battery that’s included and is USB-C PD rechargeable. Nitecore did provide this light to me to review.


Watch this review on YouTube: 

Follow me on Instagram: https://www.instagram.com/liquidretro/ 

Join the Facebook Page: https://www.facebook.com/LiquidretroReviews/ 

Enjoy this review? Buy me a Coffee/Beer: https://www.buymeacoffee.com/Liquidretro


Packaging & Accessories

The MH12 comes in a typical Nitecore retail package in the trademark black and yellow color scheme. Something that’s a little different is it doesn’t have the typical runtime chart on the back, only a long list of features, and on the side a list of use cases and accessories. Accessories included with the light itself is a 5000 Nitecore (non proprietary) button top 21700 battery, a 18650/CR123 Battery magazine, tactical holster, USB-A to C charging cable, lanyard, 2 spare o’rings, and a pocket clip, along with your normal paperwork. 

Construction

The MH12s is made from aluminum and anodized black. Machining & fit and finish are good, with no obvious problems detected. At the tail cap there is a quiet tall mechanical switch that protrudes and it takes some effort to actuate. The lanyard attachment point is on the rear tail cap and decent sized hole. Inside there is stiff springs at either end, and threads are anodized, fine and well lubricated. 


The body tube has minimal knurling but does have some on each end, you have 3 areas in the middle for the clip or tactical finger loop (not included) should you want. The body tube is glued to the head. There is a minimal anti roll ring at the front, it’ has limited effectiveness with anything but a flat surface.

The button (eswitch) on the head is aluminum as well, with a hole in the middle for power indication status, the button is relatively small and hard to find at night by feel alone, especially with gloves. There is minimal fins for heat dissipation. Opposite the button there is the USB-C charging port, the silicon cover here is well integrated and stays put without trouble. 

Up at the front there is a minimal bezel that does allow light to escape when standing on its head, it protects the anti reflective coated glass lens, and smooth bezel underneath. 


Size and Weight

I measured the overall length at 141mm, max diameter on the head at 29.5mm, minimum diameter on the body at 25.5mm. Weight with the included battery was 149.2g. The light is IP68 water rated and submersible to 2M along with the standard 1M of impact resistance.

It’s a long long light but within 5mm of the Thrunite TT20 and Olight M2R Pro, but narrower then both. 


Retention

The MH12S has quite a few retention options. It comes with a pocket clip, lanyard and a tactical hostler but is also compatible with a tactical ring that Nitecore offers separately. The pocket clip can attach facing either direction on any of the 3 ribs in the middle of the light. It’s not a deep carry clip as a good ¾ of an inch sticks op out of your pocket when put in the lowest position. My clip was slightly out of spec and doesn’t make contact with the body of the light. A little modification with some pliers should improve this situation but is a little disappointing to see on a brand new light. 

You also get a plastic belt holster that the light can be pushed into. You can put it in heads up or heads down, and it’s a tight fit. If done correctly at allows you to mount to access both the side buttons and top button from the holster. The lanyard attachment point should you choose to use that is on the tailcap. 

LED & Runtime

The light features a Luminis SST-40 W LED in cool white at 6500k. The good news here is that it’s not as blue as some older Nitecore lights which I appreciate. On ultralow and low power modes I get a slight green tinge but this disappears at higher power levels. The beam itself is small defined hotspot in the center and a large spill of less light. True to it’s name this is a nice all around beam, good for walking the dog, hiking, or more tactical uses if you wish. 

There are a handful of battery options here, the light comes with Nitecore 5000mAh 21700 battery, which will be most users primary cell, but with the battery magazine (Spacer) the light comes with it will also run 18650 and 2x CR123A batteries or RCR123. A battery capable of 8A discharge or more is needed to be able to access Turbo’s 1800 lumens or you will be limited to High’s 1050 instead. No PWM was present in this light, and I did verify this with my oscilloscope. 


Official outputs are listed as the following. 

  • Turbo – 1800 Lumens
  • High – 1050 Lumens
  • Mid – 300 Lumens
  • Low -50 Lumens
  • Ultra Low – 1 Lumen
  • Strobe/Beacon/SOS – 1800 Lumens


Heat & Runtime

I did my runtime and heat tests with the included 5000mAh Nitecore battery in uncooled conditions (More realistic). Turbo had a pretty quick step down from the 1800 lumens within the first minute and a half but it was a gradual step down and continued this trend from the 0:43:00 mark to 2:46:00 it was quite stable at 40% relative output, before it did it’s LVP warning and stepping down to 5% relative output and shutting off at 3:23:00. Max heat I saw during this time was 46C at 0:10:00.

I also ran a runtime test under the same conditions but only going to high mode, and here the light was able to sustain a much higher output for longer in comparison to turbo. Around 80% relative output or better for 3:26:00, with at total runtime of right at 4:00:00. So if you don’t need turbo this is the best mode to use for sustained output and runtime. 


UI

The light has 2 modes, first the daily mode which is the lights default and how I tested and then a tactical function. When in daily mode the light does have a memory function for all modes except SOS and Beacon. When in tactical it will only memorize turbo or strobe. 


For daily mode the light turns on with the tail switch, and then you use the e switch up front to change modes, and it cycles through all 5 non blinking modes. There are no shortcuts to jump to turbo or turn on ultralow when off. If you press and hold the mode button when on the light will go to strobe instead of cycling through modes. It’s a little different from many lights but is easy enough to understand but might be hard to remember if switching to many other lights.


Recharging

The MH12S has onboard USB-C charging, thats capable of being charged via USB-C to C and USB-C PD, another nice change to see. USB-C to C is finally going mainstream on flashlights. I charged the included 5000mAh Nitecore battery (non proprietary) from LVP at 2.947V to full at 4.198V in 3.5 hours. Max charging rate I saw was 1.9A at the 1:30 mark. The charging curve here looks a little funny with a lot of drops to near zero as detected by my meter, this also caused it to cut a little short the graph. I don’t think this is a problem for charging the cell just a bit different. The light will also charge 18560’s with the adapter if you want to. 

Pro

  • Simple interface but lacks shortcuts to moon or turbo.
  • Good all around beam
  • Not as cool white as past Nitecore Lights.
  • Wide selection of compatible batteries (21700, 18650, CR123A, RCR123A).


Cons

  • Seems long
  • Pocket clip did not make contact with the body without modification and it’s deep carry
  • Only one LED and tint option
  • UI has no practical shortcuts, requires cycling through brighter modes to go lower. 


Conclusion

The Nitecore MH12S is a solid general use light. I like that NItecore has taken a step away from ultra blue emitters but do wish they would offer a more neutral or warm tint option, in the MH series of lights since I believe these better represent the multifunction roll the lights were designed for. 

This isn’t a light I will probably EDC in my pockets due to the clip design and relatively long nature of the light, I do like it’s slim nature though. I think this is a better jacket pocket light or utilize the holster it comes with. The UI here isn’t my favorite but I can live with it. Overall I like the beam profile here of the light, and with the 21700 it has a great runtime, and it’s super great to see USB-C being implemented with full support and PD support. 

Acebeam L35 Review (5000 Lumens, 480M Throw, 21700, TIR Optic)

Today I have Acebeam’s new L35 Tactical Thrower. The one I have here has a Cree XHP70.2 LED capable of 5000 lumens with a throw out to 480 meters. It has a big TIR reflector in it’s short head to create a real wall of light that you will see in my night shots. It’s powered by a 21700 battery too. Thanks to Acebeam for sending this to me and providing a discount if you are interested in this light. More info on that will be in the description below.


Watch this review on YouTube: 

Follow me on Instagram: https://www.instagram.com/liquidretro/ 

Join the Facebook Page: https://www.facebook.com/LiquidretroReviews/ 

Enjoy this review? Buy me a Coffee/Beer: https://www.buymeacoffee.com/Liquidretro


Packaging & Accessories

The L35 comes in a cardboard retail top hanging style packaging. The front shows the light in 1:1 scale with Acebeams black and orange theme. The box has a lot of information on the side and rear panel. There are two versions of this light, one with a Cree XHP 70.2 LED and the other with a LatticePower P70 that isn’t widely available yet (New LED). The light also comes as a kit version with a 21700 battery with onboard USB-C or not. Other accessories that come with all lights are a box of spares (2x O’Rings, 1x tail button), non branded lanyard, standard paperwork and a holster. The holster on mine had a pretty crumpled end, it’s just nylon, no additional padding inside. It’s a fairly tight fit for the light, making me think this isn’t a holster made specifically for this light but one that’s repurposed from another model. 

Construction

The Acebeam L35 shares a lot of characteristics and good build quality traits with the Acebeam L17 I reviewed earlier in 2020. It has the same mat anodized aluminum and nice machining. Starting at the tailcap you have a raised branded Acebeam button, underneath it is a mechanical switch for a full actuation it does require a decent amount of force. A quick 1/8 turn on the tail cap does disable the tail button and side switch. There is a small amount of knurling thats pretty aggressive on the tail. Inside there is a single very stiff spring.

Threads on this light are anodized, square cut, nicely greased and very smooth as a result. Some of the best in the production light category. The tactical ring is aluminum and completely round, it’s removable but you first need to remove the oring in front of it. Below that is a removable pocket clip. The body of the light is glued to the head. It has a milled grip pattern into it and it’s very mild for a tactical light. I do like the look though as it’s kind of a spiral. 

The head has 3 steps before reaching it’s final diameter at the front of the light. There is minimal branding, just the brand, model number and at the back. The side switch is polished and a very tight fit. It’s fairly sensitive but flat. To the left of this at the 9 oclock position there is a LED for a battery indicator and status indicator. The head then grows with the reflector. It’s quite short for it’s diameter and there is the aggressive diamond knurling. At the very front is a pretty aggressive tumbled stainless steel strike bezel. Underneath is a glass lens over top of the TIR plastic reflector. I can see a small molding marks inside inside the reflector but these don’t show on the beam. The center is diffused as well. 


Size & Weight

Overall length of the light came in at 152mm. Minimum diameter on the body was 25.42mm, maximum diameter on the head was 54.1mm. I measured the weight with the clip on but without a battery at 166.2g. The light is rated for a 1M drop and is IPX8 rated to 5M. 


Retention

As mentioned previously the light does come with a nylon holster that’s Acebeam branded. Mine was kind of crushed at the end in shipping but still works fine. It has very little padding which is ok. There is a dring and fixed belt loop. I question if this holster was made for this light as the velcro doesn’t have full engagement. 

There is also a removable pocket clip on the light that fits below the tactical ring. It’s not fixed and rotates with moderate pressure, I would expect it to rub on the anodizing over time too. The pocket clip here is less for EDC carry in a front pocket but more for clipping on to a vest or something like that. There is a lanyard and the main attachment point is on the tactical ring.


LED & Beamshots

My L35 here is running the Cree XHP 70.2P LED in a neutral white at 5000k. Mine has a green tint that’s more noticeable at lower powers and in the corona and spill. Not very surprising to have tint shift on this Cree LED. It’s rated for 5000 lumens, a beam distance of 480 meters at 57,600 candela. There is a LaticePower P70 LED option for this light that is a slight decrease in lumens but an increase in throw by 90 meters. I will be interested to hear more about it when it becomes available as it’s a new LED. You do need a high drain (At least 20A or more) 21700 when running this light to get maximum performance. If batteries are not as high drain the light will start to blink when in turbo mode and step down quickly. 

Mode spacing is pretty good here, as you can see from the table below. It’s nice to see it have a 1 lumen moonlight mode. The jump from high at 1500 to turbo at 5000 sounds like a lot and it is quite a bit. There is no PWM with this light.


Heat and Runtime

For my runtimes tests I used an Xtar 4200mAh battery with a max amperage rating of 45A. This light requires a battery capable of 20A or more in order to see it’s top performance. In turbo the light ran for 1:15 before stepping down to about 38% relative output. This was a bit disappointing how fast it stepped down as the difference of 5000 lumens to 1500 lumens is substantial. Here it ran for another 1:10:00 before shutting down with LVP kickin in at 2.966V. I did the same runtime test but only ran it on high and got slightly longer runtime of 1:19:00. This curve was very flat. So at these higher outputs the light has a fairly limited runtime, but the good news is the cure is flat after the initial step down.

Heat was interesting, I had trouble keeping my thermal couple attached to the light, with the small shelf the tape didn’t want to stay attached as well as I hoped in my 3 test. Maybe it’s time for some high temp tape. Max temp I saw before step down was 43C, but during the longer runtimes heat continued to rise to about 55C before it looks like the thermal couple came loose during the last 15 minutes. 


UI

The UI is simple to use, you have 2 controls, the eswitch at the front and the instant access to turbo via the mechanical switch in the rear. If you turn the light on with the rear switch, the front switch doesn’t work at all. With the front switch you can simply press to turn on, and then press and hold to cycle between the normal outputs. Double press to go to turbo, and triple press to go to strobe. To lock electronically press and hold for 3 seconds, and the same to unlock or just slightly turn the tail cap. 


Pro’s 

  • I like they replaced the eSwitch from the L17 with a Mechanical switch here on the tail.
  • The hotspot is large, not a super long distance thrower.
  • Relatively small and short head given it’s performance.
  • Simple UI. 
  • Takes a standard battery


Con’s

  • Strobe isn’t utilizing all the lumens here which is a little odd.
  • Quite a bit of tint shift. 
  • No tail standing
  • Turbo runtime is quite short at just 1:15. 


Conclusion

The Acebeam L35 with the Cree XHP 70.2 LED and TIR reflector is an interesting light. It looks tactical, and and with the tail cap only working for turbo it is. It’s a little odd to not find strobe on the tail cap though but it’s not a feature I personally miss. The beam here is interesting as it’s not the throwiest for its, size or power, instead you get a large intense hotspot that goes 480 meters. The LatticePower P70 LED is a little less on peak lumens but throws another 90 meters.  It’s compatible with a remote pressure switch too should you want to run it on a weapon. 

To me it’s not quite a thrower, but definitely on the side of a more tactical then most long distance thrower lights. The beam is pretty useful, since it is larger not nearly as focused as the L17 was. It is on the expensive side but right now for Black Friday Acebeam is running a 30% off sale on this new light to help with that, and that brings it more in line with its competitors.