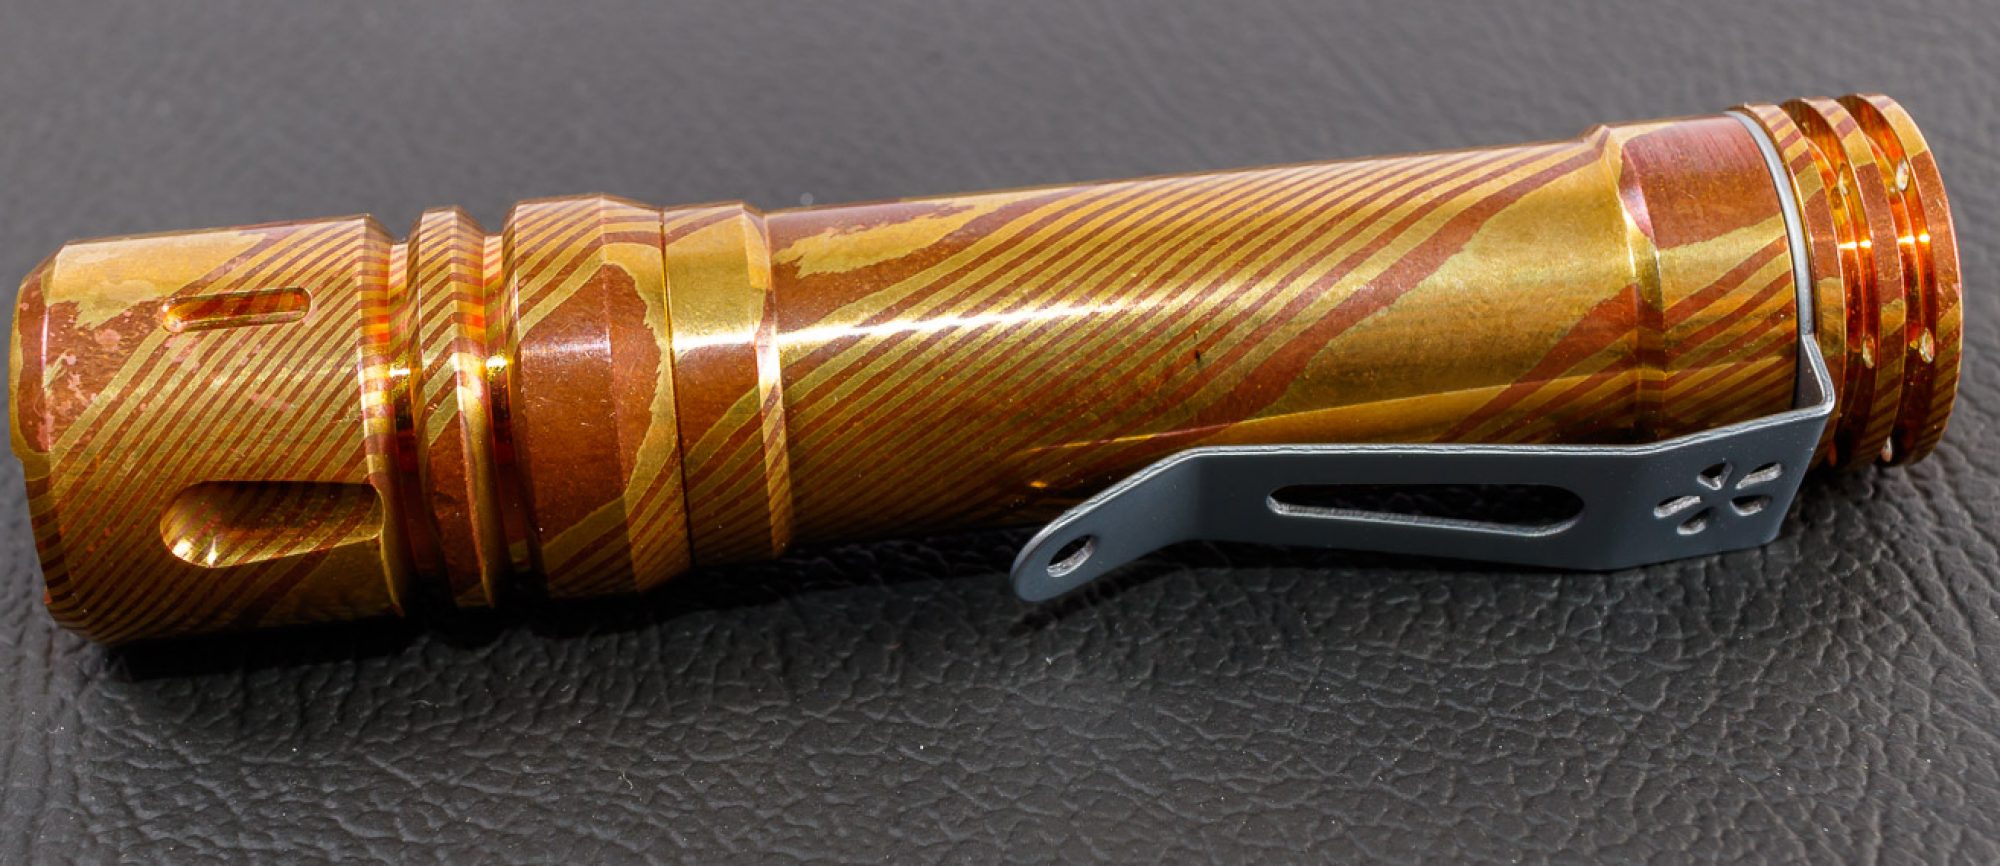
Thrunite T2 vs Seeker 2 Pro Comparison

See my full reviews of these two lights below.

Thrunite T2 https://youtu.be/5Apvie0OZRg

Olight Seeker 2 Pro https://youtu.be/O3x90cZEMhw


Pick up these two lights

Thrunite T2 Neutral White https://amzn.to/3jVEcUm

Cool White https://amzn.to/30gZeVE

Olight Seeker 2 Pro https://amzn.to/2JqRgRR

Olight Odin Dedicated Weapon Light Review (2000 Lumen, 21700, XHP 35.2 LED)

The Olight Odin is Olights first purpose built long gun flashlight. It’s using a Scout mount, has a pressure pad and is capable of 2000 lumens. There have been a fair bit of sponsored Odin reviews, I strive to be different here and tell you how I see it. Thanks to Skyben for sending it to me let’s take a look and get to the review.


Watch this review on YouTube: 

**Follow me on Instagram: https://www.instagram.com/liquidretro/ 

Join the Facebook Page: https://www.facebook.com/LiquidretroReviews/ 


Packaging & Accessories

Olight once again does a very nice job here on packaging. It’s very appleske with a white magnetic fold out box and a full color photo on the front with specs on the back. On t he inside everything is packaged very nice inside little boxes, etc. Opening the front cover you have the quickstart guide along with the light and all the accessories. There are quite a few accessories with this light including the light itself and the 4 direction mount. You also get the 5000mAh 21700 proprietary battery, the MCC2A magnetic charger cable, and the new locking pressure switch. Lastly you get a few small zip ties to help mount the pressure switch, a small allan key, and a few extra screws and manual.


Construction

The Olight Odin is made from aluminium and hard anodized in a fairly glossy black. Starting at the tail cap, you have a very similar recharging point that was on the Olight Warrior X Pro, with the longer lugs to help you find the tail switch with gloves. It’s a two stage switch with a half press being momentary and full press locking on the light. Around the rear button is another ring and what looks like a space for an o’ring this is for the included pressure switch to lock on to the light which I will explain later. On the sides of the tail you have some tear drop areas milled in place for grip and style. Inside there is a large spring loaded brass contact. 

Threads are anodized, square cut and robust. It does take several turns to get them off. This is one of the few Olights where the positive terminal of the battery faces the head. The body tube is smooth except for the Scout mount. That’s fine, remember this isn’t an EDC light or designed to be handheld, it’s designed to be mounted primarily. 

The head you can tell was milled as one piece but it’s glued on to the tail and is non removable. It has a little larger ring which I assume is to help with thermal for the electronics. Styling wise you have two milled away tear drops, about the size of an endmill. At the front there is a black bezel with small almost saw tooth shaped crenulations. The edges are reasonably sharp. The lens is glass (Good for cleaning powder residue off) and underneath that is a TIR optic. 

Mounting 

This light uses the “Scout” mounting system that Surefire pioneered with the scout series of lights. It provides a 2 post mount thats about 7.75mm off the body of the light. It’s an extra piece that’s screwed to the light with 2 small hex head cap screws with locking compound on them. When I backed the screws out with a 1.5mm Hex key.

Olight included their locking mount that is designed to fit onto a standard picatinny rail. It can mount on the left or the right, and face forward or backward. It utilizes two hex head bolts and comes with the appropriately sized hex allan key. I would recommend once you get it to where you like it, to put some blue locktite on these screws, to make sure nothing backs off during use. This mount has 2 positions on where you can mount the light either on what I will call the bottom or the side. In addition to this light can mount either direction.This mount also locks once the light is in place to help secure it. Lastly the light does have threaded screw holes in it so you can use other 3rd party mounts like my favorite offset mount by Arisaka Defense. You may have to get a little creative with these in the order you mount them to tighten down all the screws depending on what your mounting it on. The big thing here is you have a lot of options.

The pressure switch is an evolution of what we saw on the M2R and Warrior series of lights. It’s designed to go on a picatinny rail as well and is rubber so it can slide on top and to secure you can use the included zip ties. The big difference here is that the end that attaches to the light has a locking mechanism. Simply push the ring forward to engage 4 small detent balls to grip onto the light, pull this ring back to unlock. It’s pretty secure for normal use and won’t break free under normal conditions. I did see a few posts in the Olight Facebook group where people had the lock come loose during extreme combat type situations so your luck might very. I would recommend disconnecting the pressure switch during transport in a bag to prevent the light from coming on accidentally. Cable length on the pressure switch is 165mm.

Size and Weight

I measured the overall length at 136.6mm, maximum diameter on the light (not including the mount) is 29mm, minimum diameter is 24.16mm. Weight with the battery was 174.1g, adding the pressure switch it’s 222.3g. 

LED & Beam

Olight has recently gotten into the nasty habit of not defining the LED they are using on some lights, and the Odin is one of them. With the TIR optic in place you can’t see the LED either. What I can tell you is it’s a fairly neutral white tint at the Turbo setting and in lower modes it’s a bit warm.. The beam is almost all throw with the focus in the center. There is just a very slight spill and there are a few artifacts here, which I think are the edges of the bezel showing. This is perfect for it’s intended use as a weapon mounted light where you want a tight focus. 

Heat & Runtime

The Odin produces upto 2000 lumens on turbo and this lasts 2 minutes before it steps down to 52% relative output. I saw maximum heat at 60C at 2:40 of runtime. Normally I would say this is too hot to hold but since this light is designed to be placed near the muzzle end of a hot firearm it’s not really an issue. We saw one more step down at the 12 minute markand the light ran at a fading 42% output for 2 hours. At the end it had one more step down before stopping right at 3 hours of runtime. I would have wished to see Turbo last longer here but suspect the time is thermally regulated as we can see the temps heat up some after cooling off initially. Overall runtime is the best out of a 1” weapon light that I have tested.

UI

The UI here is pretty simple. On the light itself, the rear button has a half press which gives you the lower lumen mode, and a full press gives you the full 2000 lumens. If you press and hold in either mode the light is in momentary. If you do a quick press in either mode the light stays on. When the pressure switch is connected you only have the full 2000 lumens but the same press and hold gives you momentary and quick press gives you constant light. There is no strobe mode on this light. 


Recharging & Power

The Odin uses Olights Proprietary 21700 5000mAh battery which is required for this light. It’s one of the only recent Olights I can remember where the positive terminal goes in facing the head. Proprietary batteries are one of the things I dislike the most. This probably won’t be something you swap out a lot but if you want extra power be sure to buy one and keep properly stored in your kit. Olights MCC3 charging system here is a winner because it’s super easy to recharge and leave the light mounted on your weapon. It’s red when charging and green when charged, and this version charges up to 2A. Total charging time here was 2 hours and 7 minutes which seems pretty quick.

Pro’s

  • Use of the Scout mount meaning you have tons of mounting options to fit your application.
  • Complete Kit with a decent mount.
  • Good Beam for the purpose.


Con’s

  • Only is compatible with 21700 batteries, CR123A’s are not an option if your out in the field and need more light after several hours. 
  • Some possible durability issues with the locking pressure mount system.
  • LED used is unspecified but is Neutral White.


Conclusion

For me this is going to be the light I plan on leaving on my 16” build. The way I have it configured now it’s easy enough to remove if I want to, but I feel pretty confident in it’s ability to perform to leave it. I may end up picking up an offset Arisaka mount to get it a little closer to the hand guard. 


Overall I think this is a good light for most citizens and hunters. Before I would trust my life to it in a police or military role I would want to do more durability testing. With the current pandemic and ammo shortage of 2020, I didn’t put that many rounds through my AR during range testing but what I did shoot the light held up without issues. 


Pickup the Olid Odin on Amazon at https://amzn.to/2E2JxZN

Full Image Gallery: https://imgur.com/a/v50nRek

Acebeam L17 Review (160,801 Candela, 1400 Lumens, Awesome Thrower)

Today I have a new compact tactical thrower from Acebeam. They boast that the L17 which easily fits in your hand will throw out ot 802 meters. It runs off an 18650 and features a Osram LED. Thanks to Acebeam for sending me this new model. Let’s take a detailed look. 


Watch this review on YouTube: 

**Follow me on Instagram: https://www.instagram.com/liquidretro/ 

Join the Facebook Page: https://www.facebook.com/LiquidretroReviews/ 


Packaging & Accessories

The light does come in 3 different versions, a white or Green LED version both capable of 800 and 820M of throw respectively, and a Red LED version that’s capable of 460M of throw. T

The standard package is a nice retail box with a line drawing of the light and the LED lumen and distance ratings on the box. On the back side there is a lot of stats and detailed info, good for any retailer looking to sell this. Accessories that are included is the light with the clip and tactical ring installed on the light. It comes with a lanyard, spare button cover and 2 spare orings as well as the standard paperwork and manual. You also get a nylon holster that’s branded Acebeam that has a D ring and belt loop with a button. 

Acebeam offers a couple of additional accessories on their website that will work with the L17 but are not sold in the standard version. First is a 10A rated 18650 battery with microUSB charging and a remote pressure switch for only $10 which is a good price. 


Construction

The L17 is made from aluminium and is hard anodized in a flat black. In the tail is the e-switch for the light and it’s truly silent. The cover is a rubber boot that has medium texture that sits just under the bezel. Internally, the tail has a single stiff gold coated spring and then an additional contact to the inner tube of the light. Threads are anodized, square cut and smooth. 

There is a tactical ring on the body which serves as a cigar grip point, the lanyard attachment point and adds reinforcement/lock for the clip on pocket clip. Both the tactical ring and pocket clip are removable should you wish. It’s a nice way to add quite a bit of security to the clip without making it permanent. The body tube itself is plain and features no knurling, I would like to see a little more grip here or closer to the head. 

The head itself is glued to the body. The head has some decorative milling around it and it helps dissipate some heat. The bezel is aluminum and has some modest large crenulations for a tactical light. The lens is glass with a Carclo TIR lens inside designed to enhance the throw. 

Size and Weight

I measured the length at 140mm, minimum diameter of the body tube at 25.5mm, and maximum diameter of the head at 40mm. Weight with an 18650 battery is 196.9g,


Retention

You have a couple of retention and carry options with the L17. It does come with that nylon holster for belt carry. It’s a basic holster but does the job well. You also have that pocket clip. The clip is 1.4 inches from the top of the light so it’s definitely not deep carry. 

LED & Beamshot

Acebeam doesn’t specify which LED exactly is in the L17 only that it’s an Osram. I asked my contact for clarification and they said it was an Osram KW CSLPM1.TG which is a mouthful but good to know exactly whats in it. It’s a very throwy LED that Acebeam has put a TIR optic on top with a glass lens. It’s different looking than your traditional optic and this is designed for all throw. 

The result is a light that has virtually no spill, it’s all focused on the center in a tight pattern. The combination of the optic and LED choice explain the claimed 160,801 candela rating here at 1400 lumens in Turbo mode. Tint here is cool white but I don’t detect much blue in the beam. In my night shots it stands up pretty well to some of the competitors using different LEDs but this has a tighter more focused beam. I didn’t notice any PWM here.

Specs below are for the White Version I have. The Green version throws slightly further. 

  • Turbo – 1400 Lumens – 160,801 Candela
  • High – 370 Lumens – 42,025 Candela
  • Mid – 150 Lumens – 23,409 Candela
  • Low – 50 Lumens – 11,025 Candela
  • Ultra Low – 15 Lumens – 3,600 Candela


Heat & Runtime

I did all my runtime and heat tests with the supplied (optional) Acebeam 3100mAh battery that was sent. It’s a 10A battery so keep that in mind for what you decide to put in this light and choose something with at least htis rating. Total runtime was 4:35:00. In my runtime tests I saw Turbo last for 3:30 before stepping down to right at 50% relative output. This is also where I saw maximum heat at 64C (147F) so this definitely gets hot and that thermal protection kicks in to limit output. The light maintained this 50% output for a total of 1 hour before stepping down again to about 4% relative output. My advice would be if you plan to use this light on Turbo for more then once past step down is to wear gloves. It only takes exposures above 60C for more then 3 seconds to get 1st degree burns.


UI

The L17 uses a pretty traditional and simple interface. When Off long press on the rear tail switch for ultra low (15 lumen), single click to turn off. Single press to turn on to low, long press to cycle modes. Double click to go to turbo, and triple click to go to strobe. 


I will say mode spacing here isn’t super common. Ultra low is 15 lumens and throws really well for not much light. Next is low at 50 lumens, Mid is 150 lumens, high is 370 lumens. Acebeam says this will go 410 meters. Next is Turbo the full 4500 lumens or 160,801 candella. 


Pro’s

  • Nice to see colored LED’s being offered here instead of just a filter. I could see this being popular with a hunter with the green tint option. 
  • Very tight and compact beam with great throw
  • A fairly compact bezel which makes this more accessible.
  • Silent Tail Switch & good vibration resistance.


Con’s

  • The light gets incredibly hot during turbo before step down. Wear some gloves or hold the back of the light.
  • Big steps between High and Turbo. 


Conclusion

I can recommend the Acebeam L17 if you’re in the market for a fairly compact 18650 powered thrower with basically no spill. I am typically not a big fan of tactical lights but the UI on this light is pretty non-tactical so it works out well. 


This isn’t the light to take with you when hiking, or for EDC or for walking the dog to see right in front of you. It would be great for a security guard who was needing to point out a specific spot on a house or inspect something from a distance. It’s also just a lot of fun to impress your friends or significant other, it’s a lot of power and so focused. It’s probably the next best thing to a LEP light.


https://www.batteryjunction.com/acebeam-l17.html

Thrunite T2 Review (3757 Lumens, XHP 70 LED, USB-C, 21700)

Today I am taking a look at Thrunite’s newest model, the T2. It’s super floody light, producing a whopping 3757 lumens out of a Cree XHP 70 LED, a 21700 battery, and is rechargeable with onboard USB-C. Thanks to Thrunite for sending it to me to review. Let’s take a closer look. Be sure to see Thrunite’s deal on the bottom of the page for the T2.


1a


Watch this review on YouTube: 

**Follow me on Instagram: https://www.instagram.com/liquidretro/ 

Join the Facebook Page: https://www.facebook.com/LiquidretroReviews/ 


Get the Thrunite T2 on Amazon at the links below. 

Neutral White https://amzn.to/3jVEcUm

Cool White https://amzn.to/30gZeVE


Packaging and Accessories

Packaging here is Thrunites standard good quality brown cardboard box with minimal information. The side lists the model and emitter. Inside the light is protected well with foam. Accessories include the light, a 5000mAh Thrunite branded button top 21700 battery, a nylon holster, USB-A to C charging cable, 2 extra orings, a spare charging port cover and a branded lanyard along with a manual. 


Construction

The T2 shares many similar visual features to the smaller Thrunite T1 I reviewed earlier this year. The T2 is made from 6061 aluminum and has a fairly flat tail cap, that is non magnetic, but has a place milled in the side for a lanyard. The tail section and body are a one piece design. The clip only attaches at the tail and is non captured. The body section has a rectangle/rib pattern milled in oti. It’s similar to the Olight M2R which is a competitor light. The T2’s millings are deeper and the rectangle sections are a little larger. It’s a nice amount of grip.

Threads on the body tube are anodized, square cut and nicely greased. Inside the head it has a single brass post up front to fit the proprietary battery. On the outside there is a silver metallic button covering the eswitch with a hole in the middle for the LED indicator. The sides have some milled fins in them. Opposite the button is the silicone cover for the USB-C charging port. I had no trouble here with access to any of the cables I tried. The port is nicely recessed and out of the way.

The aluminum bezel has a grey accent that’s slightly tapered. Inside is a AR coated piece of glass, a wide but very shallow orange peel reflector and the giant Cree XHP 70 LED. 


Size & Weight

I measured the length at 112mm and maximum diameter on the head at 30mm and minimum diameter on the body at 26mm. Weight with the included battery and clip was 167.8g. 


Comparison

The light that i will be comparing this to is the Olight M2R. Now the M2R is a little more tactically focused but quite similar in over all size. The T2 is shorter in overall size and hardly grows in diameter. That said the M2R does have a bit more reach. The T2 seems to sacrifice it’s throw performance for the overall length of the light in the hand.

Retention

The T2 comes with a basic nylon holster, with a Dring and belt loop. The T2 fits inside just fine. You also have the option of a branded lanyard. These are basic options but do the job just fine. The T2 has as very deep carry pocket clip that only attaches at the tail of the light. It bends out and then up almost flush with the tail but on my example here that upper loop is hard to attach onto a pocket due to the step and small amount of space up top. Other than that it’s a decent clip and once you get it down over your pocket lip it carries well for a 21700 light.

LED & Beamshots

The Thrunite T2 is running a Cree XHP 70 LED and is a available in cool and neutral white. I have the neutral white and it has a bit fo green to it, not uncommon for a Cree emitter. It’s a big LED in a very short and wide reflector. The result is a very floody beam with a good amount of tint shift unfortunately. At 

When the light is dropped on it’s tail it flickers slightly but stays on. I didn’t detect any PWM with my oscilloscope. 

Official Outputs are listed as the following.

  • Firefly  – 0.3 Lumens
  • Low – 30 Lumens
  • Medium – 366 Lumens
  • High – 1712 Lumens
  • Turbo – 3757 Lumens


Heat & Runtime

With big output numbers from a big LED comes heat and output stepdowns. Turbo on the T2 started to step down at 1:10 and then ran at 38% relative output till the 8 minute mark, stepping down another 10%. FL1 was at 3 hours 12 minutes. Total runtime was 3hr 20 minutes. Peak heat was 49.9C at 1:30

I did a bit of comparison to the Olight M2R Pro also running a 5000mAh 21700 battery and you can see the Olight has a little brighter mid range but ends about 5 minutes shorter. Overall both lights are pretty comparable in terms of runtime even though their beam patterns are really used for different purposes. 


UI

The UI on the T2 is what Thrunite uses on most Thrunite and Wowtac models. Long press to go to Firefly, single click to go up in modes from L, M, H, and double press to go to Turbo. Triple press to go to strobe. There is a memory mode on all normal modes, and a lock out if you press and hold while the flashlight is off. Mode spacing here could be improved, with just 3 modes you see some big steps up, Medium to High is 366 to 1712. I would like to see another mode in the middle.


It’s kind of a bit of a shame they didn’t decide to use the T1’s ramping mode as I liked that quite a bit. For a more high end light like this, it’s almost becoming the norm to have a stepped and ramping mode that the user can switch in and out of. 


Recharging

The Thrunite T2 has onboard USB-C recharging, and it ships with an A to C cable. They advertise the light as having fast charging but doesn’t really say what that is. I had my hopes up that it would be compatible with C to C  charging via USB-C PD but at least in my testing that doesn’t seem to be the case. Charging the 5000mAh battery from LVP at 2.948V to Full at 4.199V took 3 hours 30 minutes. Maximum charging rate I saw was right at 2A. It didn’t ramp up but instead started right at 2A and then ramped down as the battery filled. The LED Indicator on the button displays power levels in real time. Greater then 21% is blue, between 11-20% red, and flashing red is less then 10% power remaining. When charging they go red and then blue when charged.

I was a little worried about the included 5000mAh battery as it has both the positive and negative terminals on the positive side, it looks identical to the battery Olight uses in the M2R Pro and in fact the Olight and Thrunite batteries are interchangeable in either light. What’s a little strange here is that Thrunite doesn’t have a contact point in the head for that negative terminal on the top of the battery so a standard button top 21700 works and charges in this light just fine. 


Pro’s

  • Compact High Lumen Flood
  • Neutral white tint is available
  • Even though it looks like a proprietary battery, standard batteries charge and work just fine.


Cons

  • Not USB-C to C Compliant, no USB-C PD support
  • Pocket clip need a little bit of tweaking to fit most pants for deep carry
  • Mode spacing is spaced out quite a bit. 0.3, 30, 366, 1712, 3757 lumens. 
  • Timed Step Down


Conclusion

The T2 a pretty good all around floody light with a lot of output from it’s Cree XHP 70 LED. It’s nice to see Thrunite continue to offer tint options on their lights. I find the overall design here a little boring to look at but in this case it’s form over function and functionally it’s pretty good. 


I would make a few small changes on a revised model if I could, another mode between medium and high to split the difference between 366 lumens and 1712 lumens. I would tweak the top loop of the clip to allow for it to fit over thicker pants easier, and I would make it compatible with a USB-C to C cable so it could be charged with many laptop and smartphone chargers. The USB-C to C cable is the one universal cable to make your life easier, we are just not there yet with most flashlights. It would be nice to see active thermal management on a light in this price range instead of a timed step down.


The battery here is really interesting, that Thrunite went to the expense of putting that negative contact on the positive end but doesn’t use it on this light. It makes me wonder what they might have coming out in the future. It’s nice here that you don’t need a proprietary battery though. 


Overall I can recommend the T2 if you need a high output flood light in a small package with a choice of tint. It even EDC’s and carries in a front pocket pretty well which I was not expecting for a 21700 light. 


Get the Thrunite T2 on Amazon at the links below. 

Neutral White https://amzn.to/3jVEcUm

Cool White https://amzn.to/30gZeVE


Thrunite is also running a promotion for the T2, limited to the first 50 people. 

1 – Buy ThruNite T2 & leave your unbiased experience on Amazon

2 – Contact review@thrunite.com to get a customer edition T1 – dark green ($45.95 on Amazon?for free, limited to the first 50 people!

Olight Perun Mini (Special Edition) Review (1000 Lumen, 16340 Headlamp, Velcro Mount)

Today I have the Olight Perun Mini, a smaller sized version of the Perun I tested earlier this year. The mini I have here is the limited edition in the Orange color which I love. It uses a 16340 battery and doesn’t have have proximity sensor. Thanks to Skyben for sending this to me to look at and review. Let’s take a closer look at this lightweight headlamp. 

The Olight Perun Mini in Orange (Special Edition) https://amzn.to/32bCVlO

The Olight Perun Mini in Black https://amzn.to/3fu8cEs

The Olight Perun Mini in Black with headband https://amzn.to/3gVjsts


Special thanks to Zeroair for allowing me to use a few photos. See his review of this light at https://bit.ly/30iih0T


Thanks to everyone who is already following me on Instagram, and on this channel’s Facebook page, It really does help the channel grow. If you’re not already following links to everything will be in the description below. 

Watch this review on YouTube: 

Follow me on Instagram: https://www.instagram.com/liquidretro/ 

Join the Facebook Page: https://www.facebook.com/LiquidretroReviews/ 


Packaging & Accessories

The package stays consistent with Olights white textured boxes and color printing. Since this is a limited edition it shows the orange off nicely. On the back it’s full of features and specs. 

Several accessories come with the Perun mini, first you get the light itself with the clip preinstalled, the proprietary Olight 550mAh battery, a lanyard and lanyard threading tool/clip removal tool, the MCC magnetic charger, and then the velcro duty patch and manual.

A headband is available for the Perun mini, but it’s an optional extra and I don’t have it here for review. I talk a bit more about it in my retention section.


Construction

The light is made from Aluminum and in this special edition anodized in a lovely bright orange color. I really do love the orange and it makes sense for a headlamp. It’s not going to be as durable as black as colored anodizing is typically softer but I am ok with that. A Lot of the design ques here are from the larger Perun. You have a flat magnetic tail with Olights recharging system built in, and the slotting for the included lanyard. 

The body is the same milled pyramids that’s been on some other recent Olights, I like it, it’s a little different and a nice amount of grip. Internally the threads are anodized and fine square cut. There is a small spring in the head, and remember because this has Olights recharging the battery goes in positive down. The head itself trades out Olights typical blue accents for black. The clip and how it mounts is a little different on this and I mention that in my Retention section. The button is fairly large and sits flat in the head of the light. I had no issues with it getting pressed accidentally when pocket carried. 


Size & Weight

I measured the overall length at 61.5mm, maximum diameter at 21.5mm at the head, and minimum diameter at the body at 20.5mm. Weight with the included battery and clip was 51.8g.


Size wise it’s very close to the Olight H1R, Wowtac H01 I reviewed last week, and about half the size as the Olight Perun I reviewed several months ago.

Retention

As an EDC in your pocket the Perun mini carries very similar to the S1R or the H1R. The one big difference is how the clip. It’s a little different design in how it attaches to the light. It’s a friction fit, and captured but the ends have a little bulb on them to help reinforce that. To remove it though you need a small tool like a screw driver or blunt butter knife to just get it started and then it comes off. It carries deep in the pocket, it’s dual direction and there is a good amount of space for material at the top of the loop.

As a Headlamp this is where things get interesting. It comes with a hoop velcro patch I will call it. On it is a tube that rotates, the clip of the light goes into this tube and it secures the light. The idea is this could be put on a hat that has a place for a patch or a uniform, plate carrier, vest, etc and wear it on your chest. None of these are things I actually have at the moment so for me it’s not the most useful but I could easily sew Velcro onto something if I needed but it’s really a specialized application.

As I mentioned earlier the traditional around the head strap isn’t included with this light, it is sold as an optional extra and I don’t have one this time. But from looking at ZeroAir’s review you can see in the photo below (Used with permission) it looks like a decent strap. Instead of having a silicone set of loops like the H1R Nova or full size Perun had it has the soft side of velcro sewed on. The idea is you take the patch mount and stick it on the headband but when your doing this it doesn’t cover all of the hook side of the velcro so it’s left there scratching your forehead. With the light being as light as it is I think the patch mount is just too big, and the best solution would be to just cut the mount up a bit where not needed. Or use the mount from another light, the mount from the H1R works fine.


LED & Beamshot

Olight has gotten into an unfortunate cycle here where on some lights for one reason or another they don’t specify the LED they are using. That’s the case with the Perun Mini, all we know is that it’s cool white but I would guess about 6000k so not too cool. If I had to guess this might be using the same LED as the full size Perun so maybe the Cree XHP 50.2 LED. There wasn’t any PWM that was noticeable to me.


The beam out of the plastic TIR optic is all mostly flood, there is a hot center but it’s spread out over most of the beam, and there is minimal spill out the rest. This works well as a shorter range headlamp and short range EDC, I have no complaints, Olight does TIR optics well. The optic itself is plastic and textured as a way to diffuse the light.

  • Turbo – 1000 Lumens then step down to 250
  • High – 250 Lumens
  • Medium – 65 Lumens
  • Low – 16 LumensMoon – 2 Lumens


Heat and Runtime

I did my runtime tests with the included Olight High drain 16340 battery. Turbo starts stepping down after 1 minute exactly suggesting it’s a timed stepp down and by 90 seconds it’s at 25% of relative output or around 250 lumens. Here is tuns out for 1 hour and 25 minutes where it hits the FL1 standard. The light keeps running out to 1hr 47 minutes before Low Voltage Protection kicks in at 3.156V. Maximum heat I saw was 38C at just at 2 minutes. 

When I compared it to the full size Perun I was a little surprised at the results. The full size light doubled the amount of time in turbo (2 minutes) but high output although it was brighter it was exactly the same.Total runtime can be compared at 1 hr 47 minutes to 2 hr 47 minutes. 


UI

The Perun mini features Olights standard UI. It does not have the proximity sensor that the full size Perun had. So when off long press gives you moonlight mode. When off a single press will give you low, if you keep holding the light will cycle through low, medium, high. Double press at anytime to get turbo, and triple click to get SOS. It’s a basic no frills, low feature UI that anyone can understand. I would love to see Olight make an advanced UI that’s switchable like some manufactures are starting to do now. 


Recharging

The Olight Perun Mini includes a proprietary 550mAh 16340 battery. It has both the positive and negative on the traditional positive end of the battery. This is so Olight’s magnetic charging system functions when the battery is installed in the light. This is down on power slightly from what other rechargeable 16340 headlamps are shipping with by about 100mAh.

It also includes the MCC 1A charging cable, I do wish Olight would make the bases or USB side different colors as there are several version now of this cable. Charging for me took 1 hour and 5 minutes, and the fastest charging rate I saw was 0.75A, so just slightly over 1C for this battery. Charging stopped at 4.237V so slightly higher voltage then I would expect to see. 

Pro’s 

  • Limited Edition Orange
  • Nice deep cary captured clip for pocket use
  • Mode spacing is pretty good, turbo is a big bump up


Con’s

  • No LED is specified officially, it’s sad to see Olight go to this. 
  • The mounting system to use it as a headlamp isn’t a fully tested idea since it leaves exposed velcro where it’s likely to scratch you. That said it works well when mounted on your chest.


Conclusion

The Olight Perun mini is a nice update to the H1R as a light itself. I do wish they would possibly considering making a 18350 version to give double the available power without much increase in diameter. Maybe we could call that the Perun Short. 


As for the mount I think the light would have a larger appeal with a better more traditional head strap with the silicone mount like what has been used in the past, and then include the velcro mount as the optional extra. Instead Olight decided to do the opposite and compromised the lights functionally to fit this niche market. From a sales standpoint it doesn’t make a ton of sense to me as a way to launch the product but I am just happy we have a nice special edition orange from Olight too.


Overall not a bad headlamp if the mounting options fit what you need or you have a silicone mount you can use from another light. It’s more expensive than some of the low cost, small headlamps I have reviewed this year but the beam is probably one of the best, if you don’t mind cool white. I can recommend it as long as you are aware of the mounting options. 


Full Image Gallery: https://imgur.com/a/cp3VG8e


The Olight Perun Mini in Orange (Special Edition) https://amzn.to/32bCVlO

The Olight Perun Mini in Black https://amzn.to/3fu8cEs

The Olight Perun Mini in Black with headband https://amzn.to/3gVjsts

Wowtac H01 Review (Headlamp, $16, 16340, USB Rechargeable)

Wowtac has a new headlamp on the market with the H01 and it’s been getting some positive buzz in the flashlight community for it’s low price and high value. It’s running a Cree XP-G2 LED, a 16340 battery, and has onboard recharging. Thanks to Wowtac for sending it to me to take a look at. Wowtac has provided a discount using my code below for the month of July, so if you like this one be sure to check that out and save a few dollars.

Wowtac has provided a discount code to get 20% off the H01 for the month of July by using code 20LiquidRetr at https://amzn.to/3iKFu3Q bringing the final price down to $15.99.


Watch this review on YouTube:

Follow me on Instagram: https://www.instagram.com/liquidretro/ 

Join the Facebook Page: https://www.facebook.com/LiquidretroReviews/ 


I am trying to grow my instagram followers so I can share links to things in my stories so if you’re not a follower please go follow me @Liquidretro and as always I appreciate you liking this video and giving that bell icon a click if you like these videos on YouTube too. 


Packaging & Accessories

Wowtac’s package is a small cardboard box with everything packed in tight. Good luck getting it to fit like it arrived ever again. The outside has just the brand, model number and emitter. In this case it’s a cool white. Included in the package is the light itself, a Wowtac wrapped standard 16340 battery, a basic Wowtac head strap, microUSB cable for recharging, 2 extra orings and a spare usb cover, and the manual.


Construction

The light is made from aluminum and machining is pretty good for the price, my only small complaint is the milled heat syncs in the rear of the head still have slightly sharp edges. The tail allows for it to tail stand but there is no magnet. There is nuzzling in the body section that’s pretty standard. Threads between the head and body tube are anodized, short and square cut. There is only a spring in the tail of the light with the head having a small brass post. 

The head has the microUSB charging port directly to the left of the emitter when looking at it head on. The port cover sits flat but the little pull tab does stick out more then I would like. On top the semi transparent silicon covers the button and sits slightly domed and smooth. There are LED underneath that are used to indicate the battery charge level and during recharging. The lens is a deeply recessed TIR style optic held on with a exterior retaining ring. 


Size & Weight

I measured the length at 67mm, diameter of the body at 21mm, maximum diameter of the head at 22mm. Weight with the battery was a light 47.7g. The light is IPX8 rated.


Comparisons to other 16340 sized headlamps.

Retention


No clip is included with the H01 which is a little disappointing but I can see why they did this given the price point and it would have been a tail down carry most likely given how the body profile is cut. The headstrap itself has a silicone mount with 2 loops and the light will mount in either direction. The straps are black with Wowtac woven into them. There is no silicone grip strips on the inside of the around the head design. I found the headband comfortable with how small and light this light is.


LED & Beamshot

The H01 is running a Cree XHP G2 LED in cool white. No specific tint is given. This does the job pretty well without any undesired tint issues like the XHP-G3 LED has so I appreciate Wowtac making this selection. My beam pattern here has a centered hot center from the TIR with a good amount of spill. There is a big of a square pattern to the spill of the beam, it’s especially noticeable at shorter ranges. There is some PWM in the middle modes, but it’s not anything I notice or my eye does. 


Specs

  • Turbo – 614 Lumens
  • High – 198 Lumens
  • Medium – 62 Lumens
  • Low – 16 Lumens
  • Firefly – 0.5 Lumen
  • SOS – 176 Lumens


For my nightshots see the video version of this review.


Runtime & Heat

For my runtimes I ran the light with the included 650mAh 16340 battery. Turbo in my tests lasted for 70 seconds, a little shorter then what Wowtac quotes, from there it continues running in the 35% relative output while slowly falling over the next 80 minutes following the decline of the batteries voltage. It’s a regulated driver but the regulation isn’t’ the best. The FL1 standard comes in at 1 hour and 27 minutes of total runtime but the light continues making light out to 2 hours and 13 minutes. The last 30 minutes of runtime the light does flash on and off every  few minutes, it’s impossible to still notice if you’re using the light at the time. When the light completely shut off I measured the voltage at 2.895V. Maximum heat I saw was 42C.

I did try to run this light with a CR123A battery as it physically fit’s in the light but the driver isn’t designed for the lower voltage range and you end up getting the low power warning which is the light flashing on and off in kind of a beacon mode.


UI

UI here is pretty standard from WowTac and Thrunite. Long press from off to get to the firefly mode. From off a quick press gets you low, and holding the button down then starts the light progressing up it’s 3 available modes. The light does have memory mode in the normal L-M-H modes. Double press takes you to Turbo, and Triple press gets you to the only blinking mode SOS. 


Recharging

Recharging the light is accomplished via the onboard MicroUSB port on the side of the light. The LED’s under the switch turn red when charging and blue when charged. While it would have been great to see USB-C here, but this light was built with a low target price so MicroUSB it is. I measured the total recharging time to take 1hr and 33 minutes, maximum charge rate was 0.52A, so just below 1C. I measured the charged battery at 4.15V.

Pro

  • High value, small and lightweight
  • Standard 16340 Battery
  • Neutral white may be available in the future.


Con

  • Unlike many other headlamps it’s not designed for pocket EDC use, there isn’t a pocket clip or tail magnet. This does help save cost.
  • Driver isn’t designed to use a CR123A battery and gives a low voltage warning if one is used. 
  • A bit of a square pattern to the spill of the beam


Conclusion

If you have watched my reviews before, you know I am a headlight proponent. I use a headlamp often around my house and car when cleaning, doing home repair projects, and just other stuff, because it allows me to have both hands free. The Wowtac H01 offers a good, low cost, basic headlamp that gets the job done. It has enough runtime on the lower modes for moderate sized tasks and is a great value for getting a complete package here with the battery included, and fast shipping from the US. If you want longer runtimes of light with a larger battery it’s going to be better suited.


My con’s list isn’t that big of a deal given the cost here and the focused headlamp only use. It’s been a while since I have seen a light with this square of beam pattern, it’s not my favorite for sure but something a non flashaholic won’t notice probably. I can recommend the H01 if you’re looking for a small low cost, rechargeable headlamp with decent runtimes, it’s certainly a much better option then genetic headlamp options from brands you have never heard from that’s available on Amazon.


Wowtac has provided a discount code to get 20% off the H01 for the month of July by using code 20LiquidRetr at https://amzn.to/3iKFu3Q brining the final price down to $15.99.

Xtar BC4 Battery Charger Review (1.5V Liion and NiHM Charger, USB-C)

Today I have a bit of a speciality charger from Xtar the BC4. It’s a charger that’s designed for use with 1.5V lithium ion batteries and NiHM rechargeable batteries. It fits both AA and AAA sizes, has 4 bays and features USB-C as an input. Thanks to Xtar for sending this too me to take a look at and review. 

I am trying to grow my instagram followers so I can share links to things in my stories so if you’re not a follower please go follow me @Liquidretro and as always I appreciate you liking this video and giving that bell icon a click if you like these videos on YouTube too. 


Watch this review on YouTube:

Follow me on Instagram: https://www.instagram.com/liquidretro/ 

Join the Facebook Page: https://www.facebook.com/LiquidretroReviews/ 


Packaging & Versions

Packaging here is a basic hanging retail package with clear front showing you everything you get. The standard unit comes with the charger, charger cover, and a USB-A to USB-C Cable. The manual is quite simple and available in several languages.

It’s worth noting there was an older model of charger that Xtar sold under their Allmaybe brand, that’s also called the BC4. That was a 4 Bay charger that charged 4.2V lithium batteries and isn’t at all like the charger we see here. It’s confusing and I wish Xtar would have chosen a different name for the charger we are looking at here today. 


Recharging

I tested the charging of this light with primarily large AA sized batteries although it will charge AAA sized batteries too. The charge will only charge NiMH and 1.5v Lithium Ion chemistries. 4.2V Lithium Batteries of either size are not supported. 

All the usual Xtar technologies are supported here, 0V activation, 3 Stage charging to maximize battery lifespan, Precise cut off when charged, Reverse polarity protection, short circuit, overheat etc. I started with charging the 1.5v Liion battery and as you can see from the graph here it took 2 hours and 16 minutes at a maximum of .3A. The batteries stopped charging at 1.54V.  

For my NiMH charge the total charge took 2 hours and 7 minutes, so slightly faster and you can see that it was a more pulsed charge with voltage remaining very consistent. 


For the last test I charged 2 nimh, and 2 liion batteries at the same time, and the total charge time was 2hrs 40 minutes. Here we saw a total charging rate peak at 1.5A spread across all 4 batteries. 

Uses for 1.5V Li Ion batteries

One thing I wanted to touch on is where and why you might choose a 1.5V lithium ion battery over a NiHM or standard alkaline. The very basics of how they work are, it’s using your standard 4.2V lithium ion cell and then has circuitry to step down the power to 1.5V. The ones here I tested Xtar provided, and since you use an external charger they have a larger capacity then  Lithium ion batteries have a better power density and lighter weight then their comparable alkaline cells, and you don’t have the one time use either. In terms of power these 1.5V batteries don’t suffer a voltage sag as they discharge like Alkaline and NiHM do, so your high drain devices like camera flashes won’t slow down during use. The bad side is the built in power meters in some devices won’t be accurate as they count on that voltage sag to estimate the amount of life left. There is also no memory effect when compared to NiHM.


I did run a quick runtime comparison with the Olight i5T CU with the Xtar 1.5v Lithium ion battery they rate at 3300mAh, and an Amazon Basics High Capacity NiMH (2400mAh) I previously had tested this light with. You can see here in the graph the outputs are identical except for the very end. The Liion cell has a very sharp drop off when the internal protection circuit kicks in on the battery and stops all current. The NiMH battery on the other hand has some gradual decline as voltage drops at the end of it’s lifecycle. Runtimes were within just a few minutes difference with the Nimh having the slight advantage on this light. Not sure how Xtar is calculating their cell rating on this one. 


Conclusion

This is a basic charger from a brand with a good track record. I am not sure it has a ton of applications in the current flashlight market for enthusiasts but it has applications elsewhere in the home. It’s a nice charger for photographers looking to recharge their eneloop batteries for flashes or those who switch over to 1.5V lithium cells which would work quite well, for anyone with kids to recharge batteries for the endless number of toys, and other household tasks. Yes there are flashlights still using AA sized batteries that use Nihm batteries where this and the 1.5V lithium batteries would work just fine, I just personally use 4.2V 14500’s in all my lights where I am able to due to more performance and good runtimes generally. 


I think this would be a little more useful charger if it also charged the more conventional 4.2V lithium ion batteries like 14500’s as then it would make a great travel charger to take care of 2 physical sizes, and 3 chemistries/voltages in a small package, and able to use USB-C to C natively. The onboard flashlight does light up but it’s a standard 5mm LED, nothing to write home about but better than nothing in an emergency. The charger also has a USB-A out that’s rated for 5V at 1A, so you could use it to charge your phone in a pinch. Overall this is a specialty charger for a niche market but it does a good basic job for what it’s designed for and I can recommend it if you fall into that niche. 

Find the the Xtar BC4 https://www.xtar.cc/product/BC4-135.html

Klarus E2 Review (1600 Lumens, 18650 deep carry EDC)

Today I have Klarus’s new Deep Carry EDC light, the E2. This is the second light in the Klarus E series, and I reviewed the E1 last year. Make sure to check the description for a link to that review. This light is designed with EDC in mind to minimize the size of an 18650 light while providing a good amount of output and features. Thanks to Klarus for sending this to me to take a look before it’s widely available. 


I am trying to grow my instagram followers so I can share links to things in my stories so if you’re not a follower please go follow me @Liquidretro and as always I appreciate you liking this video and giving that bell icon a click if you like these videos on YouTube too. 


Watch this review on YouTube:

https://youtu.be/XaKEkkzY8dw

Follow me on Instagram: https://www.instagram.com/liquidretro/ 

Join the Facebook Page: https://www.facebook.com/LiquidretroReviews/ 


Packaging

Packaging is a nice white Retail box with a red hanging tab. It has a photo of the light on the front, with the model number prominently displayed.On the back and side there are stats about the light and a chart telling more specs.

Inside the package you get the following. The light itself, along with a Klarus 3600mAh 18650 battery, deep carry pocket clip, lanyard, extra o’ring, micro USB charging cable, and small gray felt bag. 


Construction

The Klarus E2 is made from Aluminium and hard anodized a semi gloss black. It’s a nice fit and finish as recent Klarus lights have been. The tail and body are all the same as the E1 had. Starting at the tail cap, we have a dual switch design. The main switch is a larger round button that sits up somewhat proud, next to it is a paddle that acts and the secondary switch There is half a shroud built up around the larger button on the outside, to help it from getting pressed accidentally, and it’s the lanyard attachment point. This is nicely styled and works well from my experience but the downside is it’s not magnetic and it can’t tail stand. 

Threads are anodized, acme cut, and fairly small. There are springs on both ends of the light, and a dual ring system in the head like we saw on the Klarus XT21X. The body section of the light has concentric rings milled into it which gives some grip but not a ton. The head of the light is one piece with the body, in fact the entire diameter of the light is the same. There are no buttons and only minimal labeling. In my example the laser engraved serial number is not straight. The clip fit’s up on the head, and does rotate around, it can be removed if you wish. Up near the very top there is a very small tricolor LED on the side of the light that’s used for a power indicator and when changing UI modes. The front of the light unscrews in theory, and under it is a plastic lens I believe. Under that is the reflector which is similar to a TIR style optic. As a result you can’t really see the LED underneath. 


Size & Weight 

I measured the length at 115mm, and the diameter at 23mm. Weight with the included battery and clip was 110g. 


Comparisons

When compared to the E1 the E2 is 8mm longer, and the same diameter. For me for the lights I own, the Olight S2R II and S30R III, both being small 18650 lights with TIR style optics.. Diameter wise they are identical. 

Retention

The light carries in my front pocket really nicely. It’s an incredibly deep pocket clip that can also be used to attach to the bill of a hat to use as a makeshift headlamp in a pinch. Being a head up carry, it does require you to flip the light around in your hand to turn it on without having a side switch. I found this a little awkward and I think I prefer a side switch for this reason on this style of light but it was a minor complaint. The slim diameter, relative shortness, and deep carry pocket clip make for a comfortable EDC in my testing. 


LED & Beamshot

The Klarus E2 receives an upgraded LED and outputs from the E1. It’s using a Cree XHP35 HI LED in cool white. No tint data is given but it’s not crazy cool. The beam here is nice out of the TIR style flat optic, you get a hot center thats a majority of the light with minimal diffused spill and it throws further then you think with Klarus quoting 190 meters of 9025 candela.

  • High 1600 lumens
  • Medium 400 lumens
  • Low 100 lumens
  • Moon 8 lumens
  • Strobe 1600 lumens
  • SOS 60 Lumens.


Runtime & Heat

For my Runtime and heat tests I used the included Klarus branded 3600mAh battery. The lights high output of 1600 lumens began stepping down from the moment it came on and it was down to 46% of relative output at 1:10. This is an a much faster decline then I expected. The light does have some active thermal management and the light increased slowly over the next 4 minutes to 62% relative output before decreasing again around the 8:30 mark down to the 46% relative output. From here it sat pretty flat out to 10% relative output at 2:40:00 mark. Just before LVP kicked in on the light at the near 8 hour mark it did gain in brightness the last 20 minutes by 6 relative percent. You notice heat quickly on this light in high mode, the hottest I saw was 51.9C at the 45 second mark.


UI

UI on this light is the exact same as the E1 and controlled all with the switches in the tail cap of the light. Like other recent Klarus lights, there are 2 UI modes on this light. Factory default mode is Outdoor Mode, which I found to work for EDC pretty well. 


You have a paddle switch that starts allowing the light to work on low either in momentary if just clicked briefly or if you click and hold for about 1 second it will stay on. Once in the on position this paddle can be used to step through the lights 4 main modes in increasing order. 8LM, 100LM, 400LM, 1600LM. 


Also on the tail cap is a larger round mechanical switch that will give you instant access to turbo. You can half press this for momentary or full press to lock on. Once the light is on you can use the paddle to cycle between modes. 


To switch modes when the light is off, press and hold the paddle for 5 seconds and the battery indicator on the front side of the light will begin flashing red/green. Then click the large primary switch without releasing the paddle. 


The second mode is a tactical setting where the primary button turns the light on to high, then use the paddle to change modes, and in tactical the light goes from high and decreases in brightness to medium (400 lumens), Low (100 Lumens), and then Moonlight (8 Lumens). To enter the strobe while the light is on, hold the paddle for 2 seconds. When the light is off, pressing the paddle will give you direct access to the strobe. 


Lockout in either mode can be accomplished via unscrewing the tail slightly to reset.


Recharging

The Klarus E1 again uses a proprietary battery here, where both the positive and negative terminals are on the traditionally positive end of the battery. The positive terminal has a plastic spacer around it that sticks out a bit. A normal flat top battery will work in the light with a magnet spacer but you will lose the recharging feature of the light. The light uses MicroUSB for recharging which is disappointing in mid 2020.

Speaking of recharging I charged the light from LVP at 2.86V to full at 4.18V in a total of 4 hours and 25 minutes. Charge speed was around and ranged from 0.66A to right at 1A. Definitely on the slower side but safe. What I didn’t like was the light’s LED indicator on the side changed from red (charging) to green (Charged) before the light was completely full. I got the full indicator an hour before the light actually stopped using current and I tested the battery here at 4V. It would be good to see the light actually go green when it was done charging instead of being almost done.

Pro

  • Good factory deep carry clip, but it only allows for tip up carry and it rotates a bit to easily.
  • Good fit and finish, it’s a good looking production light. 
  • 2 UI modes for users to pick from. 


Con

  • Minimal change from the Klarus E1
  • Proprietary battery, this time it’s larger capacity at least.
  • Doesn’t tail stand, or is magnetic, because of the dual button configuration on the tail cap.
  • Wasn’t a fan of taking it out of my pocket and having to change grip to turn it on.
  • Moonlight mode here is brighter at 8 lumens than the E1 which isn’t moonlight at all.


Conclusion

The Klarus E2 looks familiar because it is largely the E1 that’s slightly longer, with a different LED to produce more output (still in cool white only) and comes with the battery the larger capacity E1 should have shipped with originally. 


I like it’s size for an 18650 light, it’s short, and about as narrow as possible. It has a pretty good UI and I love that it has the optional Outdoors mode or Tactical mode. The light isn’t perfect though, I found in my daily IT work I missed the ability to tail stand and a magnetic tail cap, and I didn’t love having to rotate the light in my hand when pulling it out of my pocket to use it. Moonlight mode is too bright here at 8 lumens, and it steps down super fast from it’s highest output. It’s good to see they went with the larger capacity battery here vs the E1. I hope before the light ships they revise the firmware to let the green charged light come on at closer to 4.2v vs the 4.0v it comes on in my example. 


MSRP at a few retailers who are listing the light for sale now at the time of this video is about $70 which is a little on the steep side with the competition and a big step up from the E1. A drop in price would make the light more competitive. If you liked the E1 you will like the E2 as it’s basically the exact same light with a brighter LED and higher capacity battery that’s just slightly longer overall.

Pick it up at the Klarus Store https://klaruslightstore.com/products/e2-klarus-rechargeable-tail-dual-switch-tactical-flashlight

Full Image Gallery https://imgur.com/a/6eku23l